Introduction
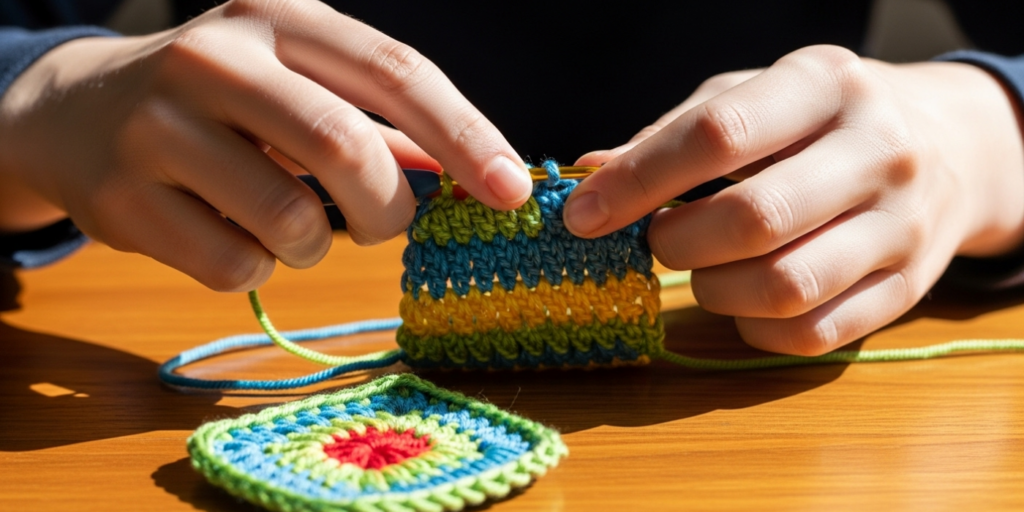
Achieving consistent stitches in crochet is one of the most common challenges beginners face, yet it remains a cornerstone of professional-looking handmade work. When your stitches vary in size or tension, projects can appear uneven, distort in shape, or fail to match pattern dimensions—frustrating outcomes that often discourage new learners from continuing their craft journey. Mastering how to crochet consistent stitches isn’t about innate talent; it’s a learnable skill built through understanding foundational techniques, mindful practice, and awareness of subtle variables like yarn behavior and hook ergonomics. In my years working with emerging fiber artists and consulting for handmade brands, I’ve observed that stitch consistency separates hobbyists from those who build sustainable creative businesses. This guide delivers a comprehensive, step-by-step methodology to develop even tension from your very first row. We’ll explore the physical mechanics of stitch formation, material considerations that impact uniformity, and progressive exercises designed specifically for beginners. By integrating these principles, you’ll transform inconsistent swatches into reliable, repeatable results—laying the groundwork for everything from simple dishcloths to intricate lace garments. Remember: every expert crocheter once struggled with wobbly edges and tight chains. What changed wasn’t their hands, but their approach. Let’s build yours.
What This Topic Means for Crochet & Knitting Businesses
For handmade entrepreneurs, stitch consistency directly impacts product quality, customer satisfaction, and brand reputation. In many crochet businesses I’ve advised, inconsistent tension leads to higher return rates, negative reviews citing “uneven texture,” and wasted materials when items don’t meet size specifications. Consider a maker selling baby blankets: if stitches tighten progressively across rows, the blanket may curl at edges or measure smaller than advertised, triggering refunds that erode profit margins. Beyond direct sales, inconsistent work limits scalability. When artisans cannot replicate their own tension reliably, they struggle to outsource production or create cohesive collections—critical barriers for growth-stage brands. Furthermore, platforms like Etsy and Instagram reward visual consistency; feeds filled with uniform, polished pieces attract followers and algorithmic visibility far more effectively than erratic outputs. From a wholesale perspective, boutique buyers explicitly reject samples with visible tension variations, viewing them as indicators of unprofessional craftsmanship. Investing in foundational stitch consistency isn’t merely a technical exercise—it’s a business imperative that reduces waste, builds customer trust, and enables premium pricing. Artisans who master this early often pivot successfully into pattern design or teaching, leveraging their reliability as a marketable asset. The time spent perfecting even stitches today compounds into long-term commercial resilience tomorrow.
Why This Strategy Works Especially Well in the Crochet Community
The crochet community uniquely benefits from focused stitch consistency training due to the craft’s inherent structure and cultural dynamics. Unlike knitting, where stitches reside on needles until secured, crochet stitches are completed immediately upon formation—making tension errors instantly permanent and highly visible. This immediacy creates both challenge and opportunity: beginners receive direct feedback with every stitch, accelerating learning when guided properly. Additionally, crochet’s global online communities—from Ravelry forums to TikTok stitch-alongs—thrive on shared troubleshooting. When new learners post swatches asking “Why are my stitches uneven?”, experienced makers consistently identify tension issues as the root cause, creating a collective knowledge base that normalizes this struggle. From working with multiple crochet brands on educational content, I’ve seen how structured consistency drills foster community bonding; group challenges like “30 Days of Even Stitches” generate supportive accountability that solo practice lacks. Moreover, crochet’s versatility across yarn weights and project types means consistency skills transfer seamlessly from amigurumi (requiring tight tension) to lace shawls (demanding fluid looseness). This adaptability builds confidence faster than crafts with narrower tension ranges. Finally, the rise of video tutorials allows learners to visually compare their hand movements against experts’, demystifying the subtle wrist rotations and yarn feeds that create uniformity. When consistency becomes a shared community goal rather than an individual shortcoming, progress accelerates organically.
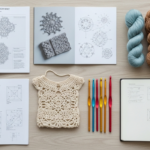
Materials, Tools, or Resources Needed
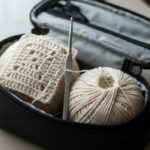
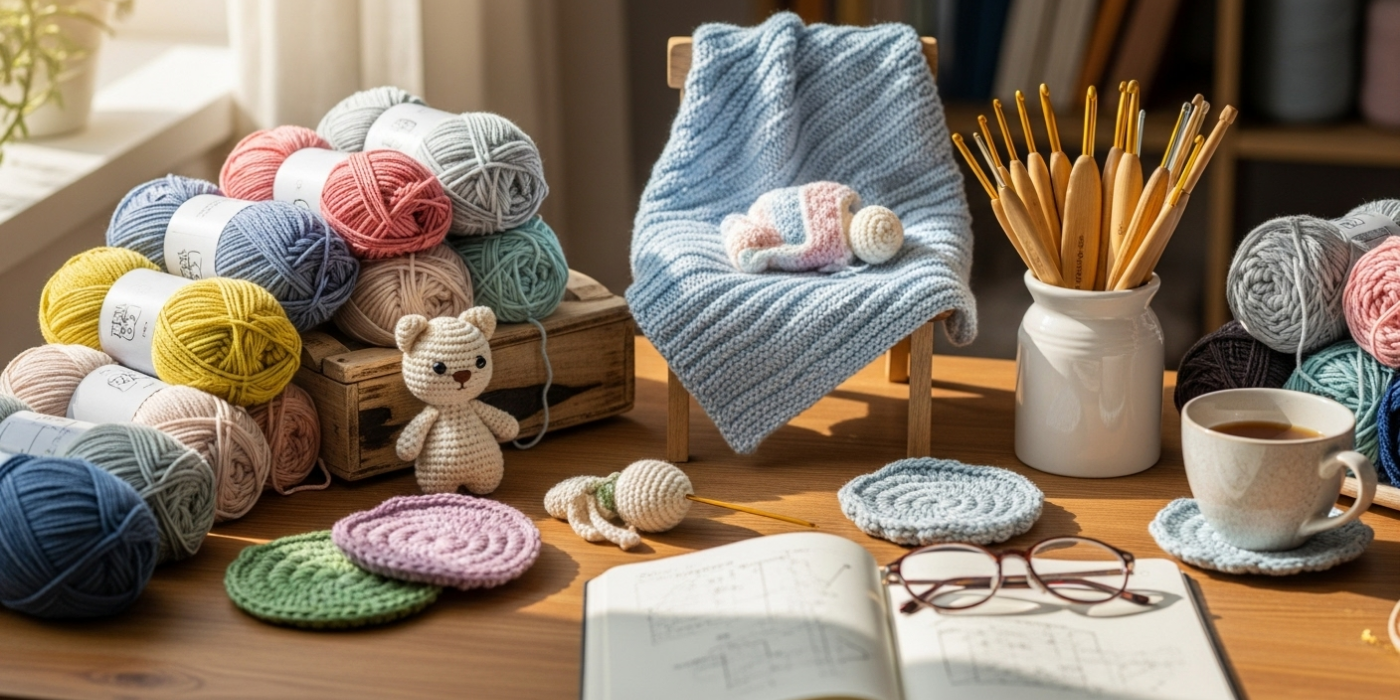
Developing consistent stitches begins with intentional tool selection. While no single hook or yarn guarantees perfection, inappropriate choices amplify beginner struggles. Start with a medium-weight yarn (Category 4 worsted weight) in a light, solid color—avoiding dark shades that obscure stitch definition or variegated yarns that camouflage tension flaws. Acrylic or wool blends offer ideal resistance for learning; slippery fibers like silk or cotton challenge tension control prematurely. For hooks, select a size recommended on the yarn band (typically 5.0–5.5mm for worsted weight), but prioritize ergonomic design. Hooks with cushioned handles or tapered throats reduce hand fatigue during extended practice, preventing tension drift caused by muscle strain. Avoid steel hooks under 3.5mm initially—they magnify minor inconsistencies. Essential supplementary tools include stitch markers (to track pattern repeats), a tapestry needle for weaving ends without distorting fabric, and a gridded blocking mat with T-pins for measuring swatch gauge. Digital resources prove invaluable: slow-motion video tutorials demonstrating yarn-over mechanics, printable tension charts comparing tight/loose/ideal samples, and mobile apps like Crochet Gauge Calculator that convert measurements to stitch counts. Most critically, maintain a dedicated practice journal. Documenting hook size, yarn lot numbers, and personal tension observations after each session reveals patterns invisible in isolated practice—such as how humidity affects your grip or which hand positions yield uniformity. Remember: tools don’t create consistency alone, but they remove avoidable variables so you can focus on technique refinement.
Yarn Types and Fiber Considerations
Fiber composition significantly influences stitch consistency, particularly for beginners still developing tactile sensitivity. Natural fibers like wool offer “memory”—they stretch during stitching but rebound to shape, forgiving minor tension fluctuations. Merino wool’s slight elasticity makes it ideal for first projects; it masks inconsistencies while teaching proper hand positioning. Conversely, 100% cotton lacks give, immediately exposing uneven tension as rigid, inflexible fabric. While cotton’s honesty benefits advanced learners refining precision, beginners often develop compensatory habits (like death-gripping the yarn) that hinder long-term progress. Acrylic yarns present a middle ground: affordable, widely available, and moderately forgiving, though lower-quality versions may split during stitching, disrupting rhythm. For consistent results, prioritize plied yarns (two or more strands twisted together) over single-ply constructions. Plied yarns resist distortion when pulled through loops, maintaining stitch integrity even with variable tension. Fiber blends—such as 80% acrylic/20% wool—combine affordability with performance, making them excellent learning mediums. Always check dye lots when purchasing multiple skeins; color variations between lots can visually exaggerate tension differences in finished pieces. Humidity also plays a role: in arid climates, natural fibers may feel stiff, requiring slightly looser tension; in humid environments, they absorb moisture and relax, demanding firmer control. When testing new yarns, crochet a 10x10cm swatch before committing to large projects. Observe how stitches behave after resting 24 hours—some fibers relax post-stitching, altering drape and dimensions. This preemptive testing prevents project-wide inconsistencies rooted in material unfamiliarity.
Skill Level Breakdown
Beginner (0–3 months experience): At this stage, consistency challenges stem primarily from unfamiliarity with yarn-hand coordination and hook manipulation. Stitches often tighten progressively across rows as hand muscles fatigue, or loosen when concentration wanes. Focus on foundational drills: chaining 50 stitches with uniform size, then working single crochet rows while consciously maintaining even yarn tension between index finger and thumb. Avoid complex patterns; instead, practice basic stitches (chain, single crochet, double crochet) on swatches until muscle memory develops. Expect inconsistency—it’s part of the process. Key milestone: producing a 10x10cm swatch where 80% of stitches match in height and width.
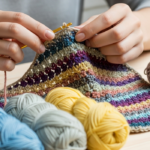
Intermediate (3–12 months experience): Learners now recognize tension shifts mid-project but struggle to self-correct in real time. Inconsistencies manifest as subtle edge curling or slight width variations between rows. This level requires diagnostic practice: intentionally creating tight/loose swatches to internalize the physical sensations of different tensions. Introduce pattern repeats with stitch markers to build rhythm, and experiment with different hook materials (bamboo vs. aluminum) to identify personal tension triggers. Key milestone: completing a rectangular project (like a scarf) with straight edges and minimal blocking required.
Advanced (1+ years experience): Mastery involves adapting tension dynamically for design intent—tightening for amigurumi structure or loosening for lace drape—while maintaining uniformity within each section. Advanced crafters troubleshoot inconsistencies preemptively: adjusting for yarn texture changes, compensating for hand fatigue during long sessions, or modifying tension for colorwork transitions. They also teach others to recognize tension cues, demonstrating how experienced designers often recommend “tension checks” every 10 rows during complex projects. Key milestone: executing multi-texture patterns (e.g., combining bobbles with mesh stitches) without visible tension disruption at transition points.
Step-by-Step Guide
Achieving consistent stitches requires systematic practice focused on three interconnected elements: hand positioning, yarn management, and rhythmic execution. Follow this progression over 2–3 weeks, dedicating 15–20 minutes daily to each phase.
Phase 1: Foundation Positioning (Days 1–3)
Sit upright with feet flat, elbows bent at 90 degrees. Rest your non-dominant forearm on a table to stabilize yarn tension. Hold the hook like a pencil (not a knife) for precision—thumb and index finger 1–2cm from hook head, middle finger supporting the shaft. With your yarn hand, drape the strand over your index finger, under middle/ring fingers, and anchor the tail between pinky and palm. The yarn should flow smoothly when pulled, with consistent resistance from finger pressure—not tight enough to strain, nor loose enough to slip uncontrollably. Practice this grip without stitching for 5 minutes, adjusting finger placement until yarn feeds evenly with minimal wrist movement.
Phase 2: Controlled Chaining (Days 4–7)
Chain 30 stitches slowly, focusing exclusively on yarn tension during the yarn-over motion. Before each chain, pause to ensure:
- Hook rotates smoothly under the yarn strand
- Index finger maintains steady pressure (not squeezing)
- Completed chain stitches slide freely along the hook shaft without jamming
After chaining, examine your work against a ruler. Inconsistent chains often tighten at the start (due to initial grip anxiety) or loosen mid-row (as concentration dips). To correct, practice “tension anchors”: place a small rubber band around your index finger where yarn rests, creating tactile feedback for consistent pressure. Repeat chaining exercises until 90% of chains measure within 1mm height variation.
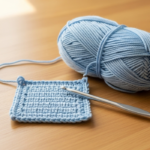
Phase 3: Single Crochet Uniformity (Days 8–14)
Work single crochet rows on a foundation chain of 20 stitches. Before inserting the hook into each stitch, verify:
- Foundation chain lies flat without twisting
- Hook enters the stitch center (not front/back loop only)
- Yarn-over motion uses identical wrist flick speed
After completing each row, measure stitch height at three points: beginning, middle, and end. If heights vary by more than 2mm, identify the cause:
- Tightening at row start? Consciously relax grip during first 3 stitches
- Loosening at row end? Set a mental timer to check tension every 5 stitches
- Edge distortion? Ensure turning chains match stitch height (e.g., 1 chain for single crochet)
Work 10 rows daily, focusing on rhythm over speed. Count stitches aloud to maintain focus: “yarn over, pull through, yarn over, pull through two” with metronome-like cadence.
Phase 4: Dynamic Tension Adjustment (Days 15–21)
Introduce double crochet to practice tension adaptation across stitch heights. Work alternating rows of single and double crochet on 20 stitches. Key focus: maintaining identical fabric density despite stitch height differences. This requires subtly loosening tension for taller stitches to prevent puckering. After 10 rows, assess fabric drape—consistent tension yields uniform flexibility across stitch types. If double crochet rows feel stiff, reduce index finger pressure by 10% during yarn-overs for those stitches only. Document adjustments in your practice journal to build personalized tension profiles.
Phase 5: Real-World Integration (Ongoing)
Apply techniques to a simple project like a washcloth (20x20cm square). Before starting, crochet a 10x10cm gauge swatch with your chosen yarn/hook. Measure stitches per inch; if inconsistent, return to Phase 3 drills. During the project, implement “consistency checkpoints”: after every 5 rows, lay work flat and verify edge straightness against a ruler. If edges curve, adjust turning chain tension immediately—do not wait until project completion. This phased approach transforms abstract tension concepts into embodied habits through deliberate, incremental refinement.
Common Mistakes and How to Avoid Them
Mistake 1: Death-Gripping the Yarn
Tightening finger pressure when concentrating creates progressively tighter stitches, especially toward row ends. This stems from anxiety about dropping stitches—a common beginner fear. Solution: Practice with a stress ball in your non-hook hand. Squeeze it gently during stitching to redirect tension anxiety away from yarn fingers. Alternatively, wrap yarn twice around your pinky for added security, reducing the need for index finger clamping.
Mistake 2: Inconsistent Hook Insertion Depth
Inserting the hook too shallow (catching only front loop) or too deep (grabbing fabric below) alters stitch height. Beginners often vary insertion depth unconsciously when tired. Solution: Place a small dot of removable fabric marker on your hook shaft 5mm from the head. Visually align this dot with the stitch base during every insertion until depth consistency becomes automatic.
Mistake 3: Rushing Yarn-Overs
Accelerating yarn-over motions during familiar stitches causes looser loops, while slowing for complex stitches creates tightness. This rhythm disruption fragments fabric texture. Solution: Use a metronome app set to 60 BPM. Perform each stitch component (insertion, yarn-over, pull-through) on separate beats until movements synchronize. Gradually increase tempo only after 10 error-free rows.
Mistake 4: Ignoring Hand Fatigue
Tension naturally degrades after 20–30 minutes of continuous stitching as hand muscles tire. Many beginners push through fatigue, embedding inconsistent habits. Solution: Set a timer for 25-minute practice sessions followed by 5-minute hand stretches. Rotate projects mid-session—switching between tight-tension amigurumi and loose-tension scarves trains adaptive control.
Mistake 5: Skipping Gauge Swatches
Assuming hook size on yarn bands guarantees consistency ignores individual tension variations. Two crafters using identical tools often produce different gauges. Solution: Always swatch with your actual project yarn. If swatch measures smaller than pattern gauge, switch to a larger hook; if larger, use a smaller hook. Never adjust tension manually to match gauge—it creates unsustainable strain.
Mistake 6: Over-Correcting Mid-Row
Noticing an uneven stitch and aggressively tightening/loosening subsequent stitches amplifies inconsistency. Solution: Accept minor imperfections during practice. Mark problematic areas with a safety pin, then analyze causes post-session rather than disrupting flow. Consistency emerges from patterned repetition, not reactive fixes.
Advanced Tips and Professional Insights
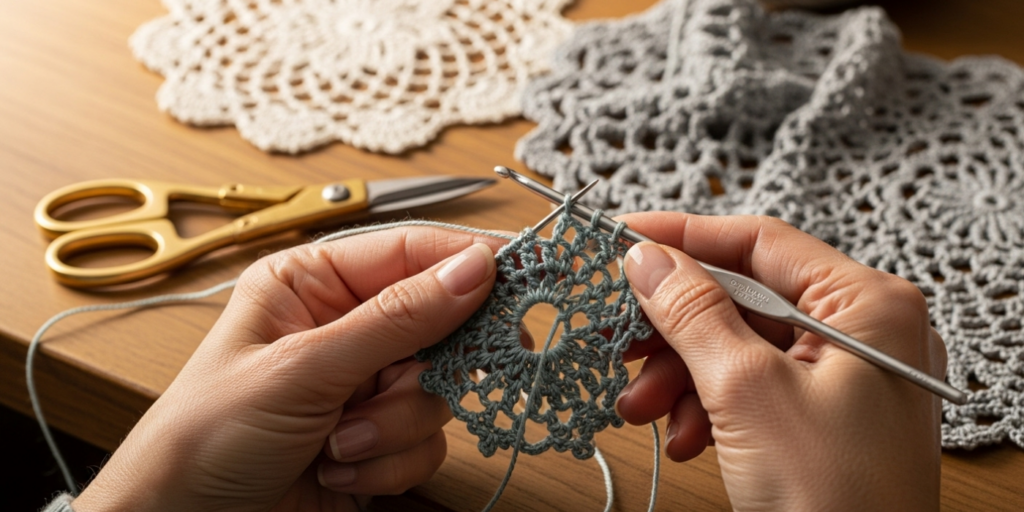
Experienced designers often recommend “tension mapping” for complex projects: before beginning, crochet a 5x5cm swatch using each stitch pattern in the design. Measure tension variations between stitch types (e.g., shells versus single crochet) and pre-adjust hook sizes—using a 0.5mm smaller hook for looser stitches to balance fabric density. From working with multiple crochet brands, I’ve observed that professional makers maintain “tension journals” documenting how environmental factors affect their work: barometric pressure changes alter yarn pliability, requiring subtle grip adjustments; afternoon sessions often yield looser tension than morning due to circadian hand flexibility rhythms. Another pro technique: the “finger anchor shift.” When working extended rows, periodically slide your yarn hand’s anchor point from pinky to ring finger to redistribute pressure and prevent fatigue-induced tightening. For colorwork, maintain consistency by carrying unused yarns consistently—either always over or under working yarn—to avoid tension spikes during strand changes. Finally, embrace “controlled inconsistency” for artistic effect: in lace shawls, deliberately loosening tension on eyelet rows enhances drape, while tightening post-stitch rows provides structure. True mastery isn’t robotic uniformity—it’s intentional variation within a consistent framework. As one industry veteran told me, “Your tension should serve the design, not the other way around.”
Real-World or Hypothetical Examples
Consider Maria, a beginner who struggled with scarf edges curling after 15 rows. Her tension tightened progressively as she subconsciously gripped the yarn tighter to prevent dropped stitches—a common anxiety response. After implementing the rubber band anchor technique on her index finger and practicing 10-minute chaining sessions daily, she reduced stitch height variation from 4mm to under 1mm within two weeks. Her breakthrough came when she filmed her hands during stitching; reviewing playback revealed she rotated her wrist outward on right-side rows but kept it neutral on wrong-side rows, causing asymmetry. Correcting this single motion yielded straight edges without blocking.
Hypothetically, imagine a small business owner creating market bags for local boutiques. Initial batches showed inconsistent mesh sizes—some sections stretched excessively while others resisted expansion. Diagnosing revealed she switched between aluminum and bamboo hooks mid-project without adjusting tension. Aluminum’s slickness required firmer grip than bamboo’s friction. By standardizing hooks per project and adding a tension checkpoint every 10 rows (measuring a 5cm section against a template), her rejection rate from buyers dropped from 30% to 2%. This case illustrates how systematic consistency protocols transform artisan output from variable to wholesale-ready.
In community settings, I’ve facilitated workshops where participants exchanged swatches blindfolded. Without visual cues, they identified tension inconsistencies purely through tactile feedback—feeling for ridges where stitches tightened or gaps where they loosened. This exercise heightened proprioceptive awareness faster than visual analysis alone, proving that consistency development engages multiple sensory channels.
Customization and Adaptation Ideas
Stitch consistency techniques adapt seamlessly across project types with minor modifications. For amigurumi requiring tight tension, practice with a hook 1–1.5mm smaller than yarn band recommendation while maintaining relaxed finger pressure—this prevents hand strain while achieving dense fabric. Conversely, for lace projects demanding fluidity, use bamboo hooks that encourage smoother yarn flow and consciously reduce index finger pressure by 20% during yarn-overs. Left-handed crafters often face mirrored tension challenges; adapting right-handed tutorials requires flipping video playback horizontally or seeking lefty-specific resources to avoid compensatory grip distortions. Children learning crochet benefit from jumbo hooks (8–10mm) and super bulky yarn—larger tools magnify motion errors, making corrections more visible while building confidence through rapid progress. For those with arthritis or limited dexterity, ergonomic hooks with enlarged handles reduce grip strength requirements; pairing these with slightly fuzzy yarns (like wool blends) masks minor inconsistencies while therapeutic practice rebuilds fine motor control. Cultural adaptations matter too: in regions where crochet serves functional purposes (e.g., fishing net repair in coastal communities), consistency focuses on structural integrity over aesthetics—prioritizing even loop strength rather than visual uniformity. Always customize drills to your physical reality; a technique perfect for one body may require adjustment for another. The goal isn’t universal tension standards but personally sustainable consistency aligned with your creative objectives.
Care, Maintenance, or Best Practices
Consistent stitches require ongoing maintenance beyond initial learning. After completing projects, implement blocking as a diagnostic tool: wet-block swatches to observe how stitches relax post-stitching. If blocked fabric reveals hidden inconsistencies (e.g., ripples indicating tension bands), document the pattern in your journal to address during future practice. Store hooks in protective cases to prevent throat nicks that snag yarn and disrupt flow—aluminum hooks especially benefit from individual slots. For yarn, maintain lot consistency within projects; even slight dye variations between lots exaggerate tension differences visually. When fatigue sets in during long sessions, perform hand stretches: extend fingers wide for 10 seconds, then make gentle fists; rotate wrists clockwise/counterclockwise 5 times each. These micro-breaks preserve tension quality longer than powering through discomfort. Seasonally, reassess your tension as humidity changes—many crafters naturally loosen grip in summer’s stickiness and tighten in winter’s dryness. Proactively adjusting finger pressure by 10% with seasonal shifts prevents project-wide inconsistencies. Finally, schedule quarterly “consistency audits”: revisit beginner swatches to measure progress objectively. Comparing current tension uniformity against past work provides motivation and identifies regression triggers (e.g., new yarn types or life stressors affecting focus). Treat consistency not as a destination but as a maintained skill requiring mindful upkeep.
Monetization Opportunities
Mastering consistent stitches opens legitimate educational monetization pathways without aggressive sales tactics. Skilled crafters often develop digital products like printable tension drill cards—featuring visual guides for finger placement and progressive exercises—that sell effectively on platforms like Etsy. These resources address a documented pain point (inconsistent tension) with actionable solutions, aligning with AdSense-friendly educational content. Another avenue: hosting virtual “stitch-along” workshops where participants practice consistency drills together via video call. Charge modest fees ($15–25) for structured sessions including personalized feedback—a model proven successful by fiber arts educators I’ve consulted. For content creators, producing YouTube tutorials demonstrating tension troubleshooting (e.g., “Fixing Tight Edges in 60 Seconds”) attracts organic traffic when optimized for queries like “why are my crochet stitches uneven.” Monetize through platform ads and affiliate links to recommended tools—only after establishing trust via genuine value. Pattern designers leverage consistency expertise by including “tension tips” sections in PDF patterns, justifying premium pricing ($6–8 versus standard $4–5). Crucially, all monetization must stem from demonstrable skill—never promise “perfect stitches in one day” or guarantee income. Ethical approaches focus on education: “This guide helped 200+ beginners improve tension” carries more weight than empty assurances. Remember, sustainable handmade businesses build on authentic expertise, not hype.
Frequently Asked Questions
How do I make my crochet stitches even as a complete beginner?
Focus on three fundamentals: maintain consistent yarn tension between index finger and thumb, insert the hook at identical depth for every stitch, and work at a slow, rhythmic pace. Practice chaining 50 stitches daily while consciously relaxing your grip—most beginners tighten unconsciously when concentrating. Within two weeks of deliberate practice, noticeable improvement occurs.
Why are my crochet stitches tighter at the beginning of rows?
This common issue stems from “first-stitch anxiety”—subconsciously gripping tighter to prevent dropped stitches when starting a new row. Combat it by making your turning chain slightly looser than working stitches, and consciously relax finger pressure during the first three stitches of each row. Placing a tactile reminder (like a small bead on your yarn) at the row start can trigger mindful tension adjustment.
Does hook material affect stitch consistency?
Yes significantly. Aluminum hooks create faster, looser stitches due to smooth yarn glide; bamboo or wood hooks provide friction that encourages controlled tension. Beginners often achieve better consistency with bamboo initially, then transition to aluminum as muscle memory develops. Always match hook material to project needs—bamboo for precise amigurumi, aluminum for fluid shawls.
How can I check my tension without counting stitches?
The “drape test” offers immediate feedback: hold your work vertically and gently shake it. Consistent tension yields uniform fabric movement—no stiff patches or floppy sections. For edges, lay work flat against a ruler; straight lines indicate even tension, while curves reveal tightening (inward curve) or loosening (outward curve). These tactile/visual checks supplement formal gauge measurement.
Will using a different yarn weight ruin my tension progress?
Changing yarn weights requires tension recalibration but doesn’t erase foundational skills. When switching weights, always crochet a 10x10cm swatch first. Thicker yarns often encourage looser tension (due to bulk), while finer yarns promote tightening. Adjust hook size per yarn band recommendations, then practice 10 rows focusing exclusively on maintaining your established rhythm—not stitch appearance.
Can hand exercises improve crochet tension consistency?
Absolutely. Strengthening intrinsic hand muscles enhances control. Daily exercises like squeezing therapy putty (5 minutes), finger lifts (placing hand flat, lifting each finger individually 10 times), and wrist circles improve dexterity and reduce fatigue-induced tension drift. Many professional crocheters incorporate these into pre-stitching routines.
How long does it take to develop consistent tension?
Most beginners achieve noticeable consistency within 20–30 hours of deliberate practice—typically 3–4 weeks with daily 20-minute sessions. However, “consistent” is project-dependent; achieving uniformity in simple scarves may take weeks, while mastering it across stitch types requires months. Focus on incremental progress: reducing stitch height variation from 5mm to 3mm to 1mm demonstrates real advancement.
Conclusion
Crochet stitch consistency emerges not from innate talent but from mindful repetition, tool awareness, and compassionate self-correction. As you implement the phased drills outlined here—from foundational hand positioning to dynamic tension adaptation—remember that uneven stitches aren’t failures but feedback. Each wobbly row teaches your hands what uniformity feels like, building neural pathways that eventually operate subconsciously. The journey from beginner frustration to fluid execution mirrors every expert’s path; what separates them isn’t perfect first attempts but persistent refinement. Carry this mindset into your practice: celebrate small victories like straighter edges or reduced blocking needs, and view setbacks as diagnostic opportunities rather than defeats. Consistency ultimately serves your creativity—it’s the invisible foundation that lets color choices, stitch patterns, and design innovations shine without distraction. Whether you craft for relaxation, community connection, or eventual entrepreneurship, reliable tension transforms crochet from a frustrating hobby into a sustainable, joyful practice. Pick up your hook today, chain 20 stitches with conscious attention, and trust that repetition compounded with awareness will yield the even, professional fabric you envision. Your hands are learning; give them time, structure, and kindness to master this essential art.

Anne Williams is a passionate crochet artist who finds purpose and expression through yarn and handmade creations. Driven by creativity and a love for the art of crochet, she transforms ideas into unique pieces, blending patience, care, and authenticity. Always eager to explore new techniques and inspire others, Anne believes crochet is a way to slow down, tell stories, and create beauty with meaning.