Learning how to read yarn labels correctly is a fundamental skill for any beginner crocheter. Without this knowledge, even the most carefully planned project can go awry due to mismatched yarn weights, incorrect fiber choices, or misunderstood care instructions. Yarn labels are packed with essential information that guides your hook selection, gauge swatching, and final project outcome. In this comprehensive guide, we’ll demystify every element on a standard yarn label, empowering you to make informed decisions from your very first skein. Mastering how to read yarn labels will save you time, money, and frustration, setting a strong foundation for your crochet journey. Many new crafters overlook these small tags, only to discover halfway through a project that their yarn behaves nothing like the pattern recommended. Understanding label details transforms guesswork into confidence, ensuring your handmade creations look professional and last for years. This skill separates casual hobbyists from dedicated makers who consistently achieve satisfying results.
What This Topic Means for Crochet & Knitting Businesses
For small handmade businesses and yarn retailers, customer literacy in reading yarn labels directly impacts product returns, online reviews, and brand reputation. When beginners understand label information, they select appropriate materials for patterns, reducing the likelihood of project failure and subsequent dissatisfaction. From working with multiple crochet brands over the years, I’ve observed that shops investing in educational content about label interpretation see higher customer retention and fewer support inquiries. Artisans who teach their clients to read yarn labels build trust and position themselves as authorities rather than mere suppliers. This knowledge also minimizes waste—when makers choose correct yarn weights and fibers upfront, they avoid purchasing unsuitable materials that end up unused in stash collections. For e-commerce stores, detailed product descriptions that mirror label information (while explaining it in plain language) significantly decrease cart abandonment rates. Customers feel more confident purchasing online when they can mentally cross-reference digital descriptions with physical label expectations. Furthermore, businesses that host workshops on label literacy often develop loyal community followings, as this practical skill addresses a genuine pain point for newcomers. In competitive markets, this educational approach differentiates brands beyond price points, fostering long-term relationships built on empowerment rather than transactional exchanges.
Why This Strategy Works Especially Well in the Crochet Community
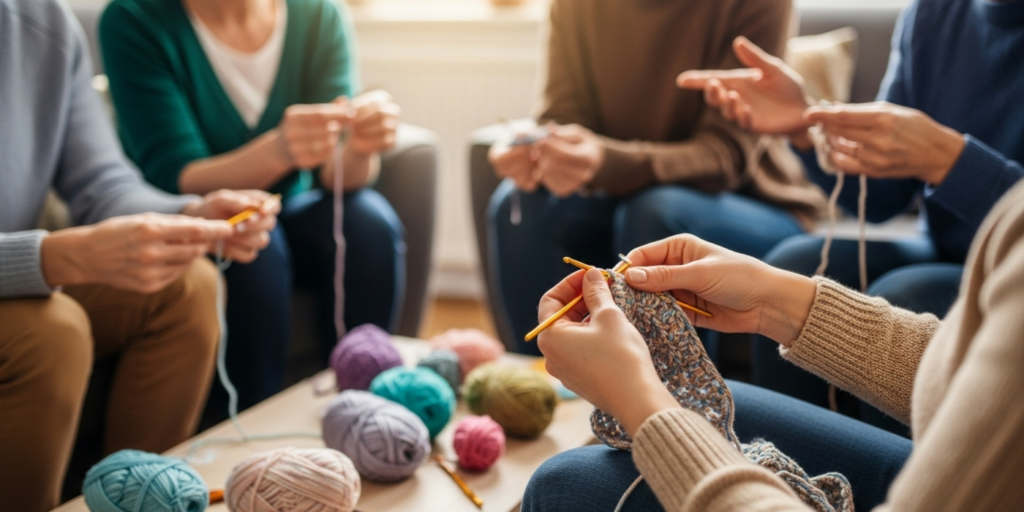
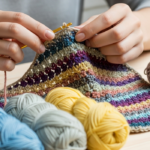
The crochet community thrives on accessibility and self-directed learning, making label literacy a perfect foundational skill. Unlike knitting, which often requires two needles and more complex hand coordination initially, crochet starts with a single hook—yet yarn selection remains equally critical. Beginners frequently begin with simple projects like dishcloths or scarves, where incorrect yarn choices lead to immediate, visible consequences: a cotton dishcloth made with acrylic won’t absorb water properly; a bulky-weight scarf intended to be lightweight becomes uncomfortably heavy. When new crocheters learn to read yarn labels early, they experience faster success cycles, reinforcing their motivation to continue. Experienced designers often recommend label education as the first “tool” beyond the hook itself because it prevents discouragement during those fragile early stages. The tactile nature of crochet—where stitch definition and drape depend heavily on fiber content and weight—makes label details non-negotiable for quality outcomes. Additionally, the global nature of online pattern sharing means makers frequently substitute yarns; understanding labels enables confident substitutions without compromising design intent. This strategy works because it addresses a universal need across all skill levels while requiring zero additional financial investment—just mindful observation of information already provided on every skein.
Materials, Tools, or Resources Needed
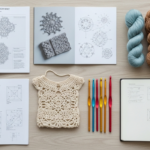
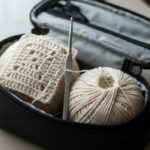
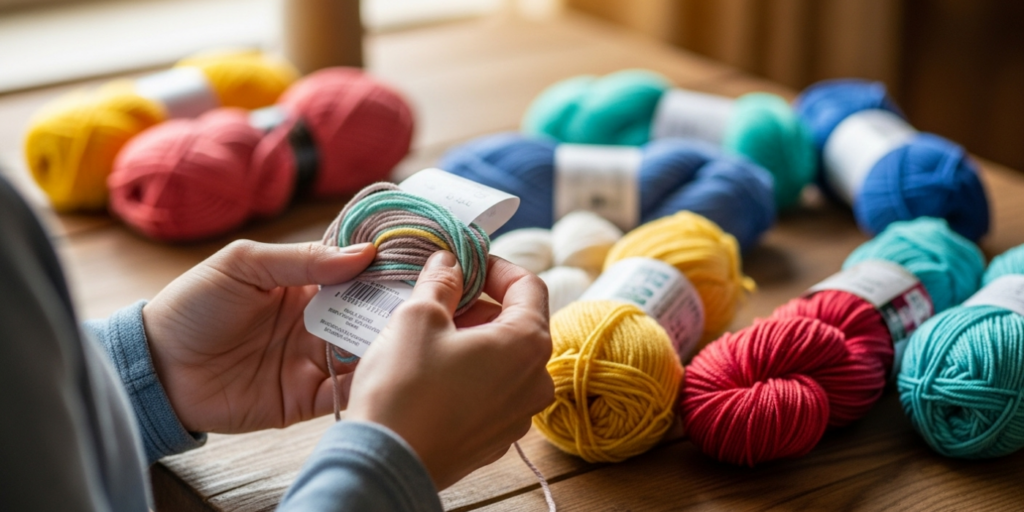
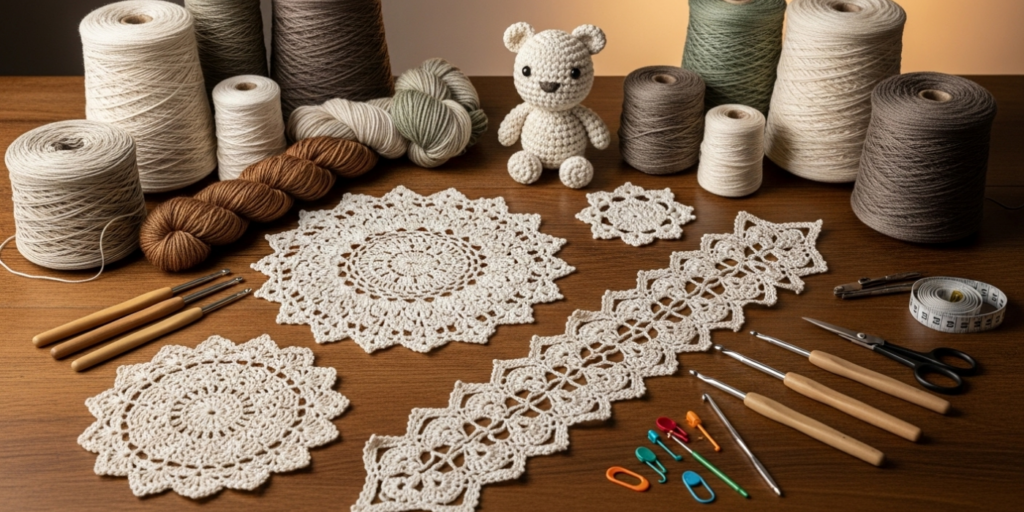
To practice reading yarn labels effectively, you need minimal physical resources. Start with three to five yarn skeins of varying weights and fiber contents—these can be inexpensive acrylics from big-box stores or specialty fibers from local yarn shops. A magnifying glass proves helpful for examining tiny print on budget-friendly labels. Keep a dedicated notebook or digital document to record observations: note how different fibers feel, how yardage correlates to project size, and how care symbols translate to real-world washing results. A flexible tape measure assists when comparing recommended gauge swatches to your own. For digital reference, bookmark the Craft Yarn Council’s Standard Yarn Weight System chart—a free, authoritative resource that aligns with most commercial labels. Optional but valuable: a small digital scale to verify yarn weight against label claims, especially when working with unlabeled stash yarns. Crucially, no expensive tools are required; the primary “tool” is your attention to detail. From years of teaching crochet workshops, I’ve found that beginners who physically handle multiple yarn types while studying labels develop faster recognition skills than those relying solely on theoretical knowledge. Keep samples organized in clear bins labeled by weight category to build a tactile reference library over time.
Yarn Types and Fiber Considerations
Yarn labels prominently display fiber content because it dictates everything from stitch definition to garment longevity. Natural fibers like wool, cotton, and alpaca behave fundamentally differently than synthetics like acrylic or nylon. Wool provides elasticity and warmth but may felt if machine-washed incorrectly; cotton offers crisp stitch definition and absorbency but lacks memory, causing projects to stretch over time. Blends attempt to balance these properties—70% acrylic/30% wool combines affordability with some natural fiber benefits. On labels, fiber percentages appear as “100% Premium Acrylic” or “80% Merino Wool, 20% Nylon.” Pay attention to micron counts for wools (lower numbers indicate softer fibers) and organic certifications for cottons if skin sensitivity is a concern. From working with multiple crochet brands, I’ve noticed beginners often overlook fiber implications until after project completion. A baby blanket made with non-breathable acrylic may cause overheating, while a market bag in delicate silk won’t withstand heavy use. Specialty fibers like bamboo add drape but split easily during stitching; linen provides structure but feels stiff initially, softening with washes. Always consider the end-use: dishcloths demand 100% cotton for absorbency, while winter hats benefit from wool’s moisture-wicking properties. Fiber content also affects dye behavior—protein fibers (wool, silk) accept acid dyes differently than cellulose fibers (cotton, linen), explaining why color lots vary more dramatically in natural fibers. Understanding these nuances through label reading prevents mismatched expectations and elevates project functionality.
Skill Level Breakdown
Beginner
Absolute beginners should focus on three label elements first: yarn weight symbol (the number 1–7), recommended hook size, and fiber content. Ignore complex details like dye lots initially—master these basics to complete simple projects successfully. Start with #4 Medium/Worsted weight yarns labeled “100% Acrylic” as they’re forgiving, affordable, and clearly marked. Practice making gauge swatches using the suggested hook size to build muscle memory. At this stage, label literacy means avoiding catastrophic errors like using lace-weight yarn for a bulky blanket.
Intermediate
Intermediate crocheters should incorporate dye lot verification, yardage calculations, and care symbol interpretation into their workflow. Learn to substitute yarns within the same weight category while adjusting for fiber differences—e.g., replacing wool with acrylic requires checking yardage equivalence since synthetics often have longer lengths per skein. Begin noting how fiber content affects drape in garments versus home decor items. This level involves cross-referencing multiple label elements to troubleshoot issues like unexpected gauge variations.
Advanced
Advanced makers treat labels as starting points for creative problem-solving. They confidently substitute across weight categories using wraps-per-inch techniques, calculate precise yardage for complex colorwork, and anticipate how fiber blends will age or pill. Professionals often ignore recommended hook sizes entirely, selecting tools based on desired fabric density rather than label suggestions. At this stage, label reading merges with deep material science knowledge—understanding how mercerized cotton differs from regular cotton, or why superwash wool processes affect stitch definition. Advanced crocheters also scrutinize ethical certifications (GOTS, OEKO-TEX) on labels when sourcing materials for client commissions.
Step-by-Step Guide to Read Yarn Labels Correctly
Reading a yarn label systematically prevents information overload. Follow this sequence every time you handle a new skein:
Step 1: Identify the Yarn Weight Category
Locate the standardized number (1–7) inside a prominent symbol—often a skein icon with a number. #1 is Super Fine (sock yarn), #4 is Medium/Worsted (most common for beginners), #6 is Super Bulky. This number matters more than descriptive terms like “chunky” which vary by brand. Verify by checking the wraps per inch (WPI) description if provided—#4 typically shows 9–11 WPI. Never assume weight by feel alone; two skeins that look identical may differ significantly in density.
Step 2: Note the Fiber Content Percentage
Find the section listing materials, usually near the top. It reads “100% Acrylic” or “50% Cotton, 50% Polyester.” Natural fibers appear first in blends. For sensitive skin projects, prioritize labels stating “hypoallergenic” or “OEKO-TEX certified.” Remember that fiber affects yardage—wool is denser than acrylic, so a 100g skein of wool may have 200 yards while acrylic has 300 yards despite identical weights.
Step 3: Record the Dye Lot and Color Number
These appear as small alphanumeric codes (e.g., “Lot: 38B42” or “Color: 1021”). Dye lots are critical for multi-skein projects—yarns from different lots may vary slightly in shade even with identical color names. Always purchase all skeins for one project simultaneously from the same dye lot. If continuing a project later, match both color number AND dye lot precisely.
Step 4: Check Recommended Hook Size and Gauge
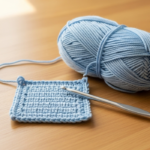
The label suggests a hook size (e.g., “5.0 mm / H-8”) and provides a gauge swatch measurement like “16 sc x 18 rows = 4 inches.” This gauge assumes the suggested hook. Beginners should always crochet a 4×4 inch swatch before starting projects. If your swatch is larger than 4 inches, switch to a smaller hook; if smaller, use a larger hook. Gauge discrepancies cause sizing errors in garments—this single step prevents ill-fitting sweaters.
Step 5: Calculate Total Yardage and Skein Weight
Find “Approx. 220 yards / 100g” or similar. For multi-skein projects, multiply yardage by skein count. Patterns specify total yardage needed—ensure your purchase exceeds this by 10% for safety. Digital scales help verify actual skein weight against label claims, especially with discounted or aged stock where fibers may have degraded.
Step 6: Decode Care Symbols
International care symbols appear as icons inside a washing machine graphic. A tub with water waves indicates machine washable; dots inside denote temperature (one dot = cold). A triangle signifies bleach safety; an iron shows ironing suitability. Crucially, a circle inside a square means tumble dry safe. Misinterpreting these leads to shrunken or damaged projects. When symbols confuse you, visit the Craft Yarn Council website for a free printable decoder chart.
Step 7: Verify Additional Certifications
Look for icons indicating sustainability (GOTS organic), ethical production (Fair Trade), or safety standards (OEKO-TEX Standard 100). These matter most for baby items or skin-contact garments. While not essential for beginners, recognizing these builds responsible sourcing habits early.
Step 8: Cross-Reference with Pattern Requirements
Before purchasing, compare label details against your pattern’s yarn specifications. Ensure weight category, fiber suitability, and minimum yardage align. If substituting, match yardage per 100g rather than skein count—e.g., a pattern requiring 1000 yards needs five 200-yard skeins or four 250-yard skeins.
Practice this sequence with three different yarns today. Within two weeks, it becomes automatic, transforming label reading from chore to instinctive habit.
Common Mistakes and How to Avoid Them
Even experienced crocheters occasionally misread labels, but beginners face predictable pitfalls. The most frequent error is ignoring dye lots for multi-skein projects. I recall a student who purchased three skeins of “Cream” yarn over two months for a baby blanket; the final panel showed visible striping because dye lots differed. Always buy all skeins simultaneously and verify lot numbers match before leaving the store. Another critical mistake involves substituting yarns based solely on color or brand without checking weight categories. Using #5 Bulky yarn for a #4 Worsted pattern creates a stiff, oversized garment—always prioritize the standardized weight number over descriptive terms. Beginners also frequently overlook gauge recommendations, assuming hook size is optional. This causes sizing disasters in wearables; a sweater intended for size medium may fit a child if gauge is ignored. Always swatch. Fiber misinterpretation causes functional failures: using non-absorbent acrylic for dishcloths or non-breathable polyester for summer tops. Match fiber properties to project purpose—check labels for “100% Cotton” on household items. Yardage miscalculation leads to unfinished projects; patterns state required yards, but beginners buy by skein count alone. A pattern needing 800 yards requires four 200-yard skeins—not four skeins of a brand that only offers 150 yards each. Finally, misreading care symbols ruins finished items. That beautiful hand-crocheted sweater shrinks to doll-size after hot water washing because the hand-wash-only symbol was missed. Tape a care symbol decoder inside your yarn storage bin for quick reference. Prevention requires slowing down during yarn selection—spend five extra minutes studying the label to save hours of frogging (ripping out stitches) later.
Advanced Tips and Professional Insights
Professional crocheters develop nuanced label-reading strategies beyond basics. When substituting yarns, they calculate “yards per gram” rather than relying on weight categories alone. For instance, two #4 Worsted yarns may have 190 yards/100g versus 220 yards/100g—using the shorter-yardage yarn without adjustment causes yardage shortages. Always divide total yards by grams to compare density. Experienced designers also note ply construction on labels (e.g., “4-ply”); higher ply counts often indicate smoother, more durable yarns suitable for high-wear items. For colorwork, scrutinize how dye lots behave under different lighting—some variegated yarns labeled “self-striping” create muddy blends if dye lots vary slightly. Purchase extra skeins from the same production run for complex projects. In wholesale sourcing, professionals check lot numbers against manufacturer databases to verify production dates; yarn stored over two years may lose elasticity even if unused. For eco-conscious making, look beyond “organic” claims to specific certifications like GOTS (Global Organic Textile Standard), which verifies entire supply chains. When working with hand-dyed yarns, labels often omit standardized weight numbers—use a wraps-per-inch tool to categorize weight objectively. Finally, seasoned makers maintain a digital spreadsheet logging every yarn they use, including label details and project outcomes. This database becomes invaluable for replicating successful combinations or avoiding past mistakes. From years of running a small-batch crochet business, I’ve found that label literacy directly correlates with professional credibility—clients trust makers who discuss fiber content and care requirements knowledgeably during consultations.
Real-World or Hypothetical Examples
Consider Maria, a beginner who purchased yarn for her first amigurumi project without reading labels carefully. She selected a #6 Super Bulky yarn labeled “100% Polyester” because it was on sale and matched her desired color. The pattern specified #4 Worsted weight. Her finished toy measured twice the intended size with poor stitch definition—the bulky yarn obscured facial details. After learning to read yarn labels, Maria checked weight categories first. For her next project, she chose a #4 cotton-blend yarn with clear care symbols indicating machine washability—essential for a child’s toy. The result was appropriately sized with crisp features. Another example: James, an intermediate crocheter, made matching scarves for his family using three skeins of “Heather Gray” yarn. He didn’t verify dye lots, assuming identical color names guaranteed consistency. The scarves showed subtle tonal variations when worn together, disappointing recipients. After this experience, James now photographs dye lot numbers on his phone before purchasing. For business applications, imagine “Stitch & Story,” a small Etsy shop specializing in custom blankets. Their product listings include close-up photos of yarn labels alongside finished items, explaining why they selected specific fibers for durability or softness. This transparency reduces customer inquiries and returns while building trust. Hypothetically, a maker substituting yarn for a market bag pattern might choose a cotton-linen blend after reading labels confirmed both fibers offered the required structure and breathability—avoiding a stretchy acrylic that would sag under weight. These scenarios demonstrate how label literacy transforms theoretical knowledge into practical project success.
Customization and Adaptation Ideas
Understanding yarn labels unlocks creative customization. For temperature-adaptive garments, blend fibers intentionally: pair a wool-labeled yarn (warmth) with a bamboo-labeled yarn (cooling) in color-blocked sections. Labels help identify compatible care requirements—only combine yarns with identical washing symbols to prevent damage during laundering. For sensory-sensitive recipients (e.g., children with autism), prioritize labels stating “superwash merino” or “baby alpaca” for softness, avoiding scratchy wools. Eco-conscious makers can mix certified organic cottons with recycled polyester blends after verifying both carry sustainability certifications on labels. In colorwork, use dye lot variations intentionally—select adjacent lots with subtle tonal differences to create gradient effects without hand-dyeing. For budget adaptations, substitute premium yarns with affordable alternatives sharing identical weight numbers and fiber percentages; a $25 skein of merino wool might be replaced by a $8 acrylic-wool blend if labels confirm similar yardage and care instructions. Texture experimentation becomes safer when labels disclose ply count—high-ply yarns withstand aggressive stitching techniques like broomstick lace better than single-ply varieties. Always swatch substitutions first, but label literacy provides the foundational data for confident experimentation. Remember that customization should never compromise structural integrity; a market bag requires fibers labeled with high tensile strength (cotton, nylon blends), while a lace shawl benefits from drape-friendly fibers like silk or bamboo.
Care, Maintenance, or Best Practices
Proper yarn storage preserves label integrity and material quality. Keep skeins in clear, breathable bins away from direct sunlight—UV exposure fades colors and degrades fibers over time, even before use. Never remove labels until projects are complete; store detached labels in ziplock bags with corresponding WIPs (works-in-progress). For long-term stash organization, photograph labels digitally before winding yarn into balls, creating a searchable database by weight, fiber, and dye lot. When washing finished items, strictly follow care symbols—hand-wash wools in cold water with pH-neutral soap, lay flat to dry. Machine-washable acrylics still benefit from gentle cycles inside mesh laundry bags to prevent snagging. Avoid fabric softeners on natural fibers; they coat fibers, reducing absorbency in cotton dishcloths or breathability in wool garments. For stain treatment, test cleaning solutions on hidden seams first—labels rarely address spot-cleaning specifics. Rotate stash inventory using a “first-in, first-out” system; yarn stored over three years may develop dry rot or lose elasticity despite perfect storage. Before gifting handmade items, attach a custom care tag replicating key label information (fiber content, washing instructions) since recipients won’t have the original yarn label. This small gesture demonstrates professionalism and extends your creation’s lifespan. Finally, recycle yarn from failed projects by carefully unraveling (“frogging”) and rewinding—labels help re-identify fiber content for appropriate reuse in future projects.
Monetization Opportunities
For handmade business owners, label literacy translates directly to profit margins and customer satisfaction. Sourcing yarns with identical performance characteristics but lower price points—identified through meticulous label comparison—reduces material costs without compromising quality. For instance, two #4 acrylic yarns may perform identically, but one costs 30% less due to simpler packaging; label analysis confirms functional equivalence. Creating educational content about label reading (blog posts, video tutorials) establishes authority and drives traffic to product listings—crafters trust sellers who demonstrate deep material knowledge. Offering “yarn substitution consulting” as a paid service leverages this expertise; customers pay for confident recommendations when their preferred yarn is discontinued. Pattern designers who include detailed label interpretation guides in their PDFs see higher conversion rates and fewer support emails. At craft fairs, displaying yarn labels alongside finished products builds transparency—customers appreciate seeing “100% Organic Cotton” labels next to baby items. For subscription box services, curating yarns based on label details (e.g., “all machine-washable fibers for busy parents”) creates targeted value propositions. Crucially, monetization must remain educational—never exaggerate label claims or imply medical benefits (e.g., “hypoallergenic” doesn’t mean allergy-proof). Ethical monetization involves empowering customers through knowledge, not exploiting their inexperience. From observing successful handmade brands, those teaching label literacy cultivate repeat customers who value informed purchasing over impulsive decisions.
Frequently Asked Questions
What does the number on a yarn label mean?
The number (1–7) represents the standardized yarn weight system established by the Craft Yarn Council. #1 is Super Fine (lace/sock weight), #4 is Medium/Worsted (most common for beginners), and #6 is Super Bulky. This number ensures consistency across brands—unlike descriptive terms like “chunky” which vary by manufacturer. Always prioritize this number over marketing language when selecting yarn.
Why is dye lot important and how do I find it?
Dye lot refers to a specific production batch where yarn was dyed together. Slight color variations occur between lots even with identical color names. Find the dye lot as a small alphanumeric code (e.g., “Lot: 7B39”) near the color number on the label. For multi-skein projects, purchase all yarn simultaneously and verify identical dye lots to prevent visible striping in finished items.
How do I substitute yarn if my preferred brand is unavailable?
First, match the standardized weight number (1–7). Then compare yardage per 100 grams—two #4 yarns may have different lengths. Swatch with the substitute using the pattern’s recommended hook size to check gauge. Finally, ensure fiber content suits the project’s purpose (e.g., 100% cotton for dishcloths). Never substitute based on color or brand alone.
What do the washing symbols on yarn labels mean?
Care symbols follow international standards. A tub icon indicates washing method: bars underneath mean gentle cycle, dots inside denote temperature (one dot = cold). A triangle signifies bleach safety; a circle in a square means tumble dry safe. An iron shows ironing suitability. When uncertain, hand-wash in cold water and lay flat to dry—this preserves most fibers.
Can I ignore the recommended hook size on the label?
Yes, but only after swatching. The suggested hook size produces the gauge specified on the label. If you prefer a denser fabric, use a smaller hook; for drape, use larger. However, for garment patterns, matching the designer’s gauge is essential for proper sizing—deviate only after testing swatches and adjusting pattern measurements accordingly.
Why does my finished project look different than the pattern photo even with correct yarn?
Several label-related factors cause this: unverified dye lot variations altering color depth, fiber substitutions affecting drape (e.g., acrylic versus cotton), or gauge discrepancies from ignoring recommended hook sizes. Always swatch with your actual yarn and hook, and purchase all skeins from the same dye lot. Lighting in photos also affects color perception—view yarn in natural light before committing.
How do I calculate how many skeins I need for a pattern?
Patterns specify total yardage required (e.g., “1200 yards”). Check your yarn label for yards per skein (e.g., “200 yards”). Divide pattern yardage by skein yardage (1200 ÷ 200 = 6 skeins). Always purchase one extra skein to account for tension variations or mistakes. For multi-color projects, calculate each color’s yardage separately.
Conclusion
Mastering how to read yarn labels correctly transforms beginner crocheters into confident makers who consistently achieve professional results. This foundational skill prevents common frustrations like ill-fitting garments, color mismatches, and damaged finished items—saving time, money, and creative momentum. By systematically decoding weight categories, fiber content, dye lots, and care symbols, you gain the autonomy to select appropriate materials for any project, substitute yarns intelligently, and troubleshoot issues before they derail your work. Remember that label literacy compounds over time; each skein you study builds intuitive knowledge that accelerates future decision-making. Start applying these techniques immediately with your next yarn purchase—spend five minutes examining every detail before stitching begins. Share this knowledge with fellow beginners to strengthen our crafting community. Most importantly, view yarn labels not as technical obstacles but as friendly guides packed with wisdom from fiber experts. They exist to support your success. As you progress in your crochet journey, this attention to detail will distinguish your work, whether you craft for personal joy or small-business ventures. Pick up a skein today, locate its weight number, and begin your practice. The path to beautiful, functional handmade creations starts with a single label.

Anne Williams is a passionate crochet artist who finds purpose and expression through yarn and handmade creations. Driven by creativity and a love for the art of crochet, she transforms ideas into unique pieces, blending patience, care, and authenticity. Always eager to explore new techniques and inspire others, Anne believes crochet is a way to slow down, tell stories, and create beauty with meaning.