Crochet shaping is the cornerstone of transforming flat, two-dimensional fabric into beautifully contoured, three-dimensional objects that fit the human form or achieve specific artistic silhouettes. Without deliberate shaping techniques—strategic increases, decreases, and structural manipulations—even the most intricate stitch patterns can result in garments that sag, accessories that lack definition, or amigurumi that appear lumpy and unrefined. This comprehensive guide delves deep into the principles, practices, and professional insights surrounding crochet shaping and structure, providing a definitive resource for crafters at every level. Drawing on years of hands-on experience designing garments, teaching workshops, and consulting for handmade brands, we will explore not only the technical execution of shaping but also its profound impact on fit, aesthetics, and commercial viability. Whether you are a beginner learning your first decrease or an advanced designer engineering complex sculptural forms, understanding how to manipulate stitches to create intentional shape separates functional craft from true artistry. In the sections that follow, we break down every element—from tool selection and yarn behavior to step-by-step execution and business applications—to equip you with actionable knowledge that elevates your work. Mastery of crochet shaping is not merely a technical skill; it is the foundation of professional-quality results that delight wearers, stand the test of time, and command respect in the handmade marketplace.
What Crochet Shaping Means for Handmade Businesses
For crochet and knitting businesses, proficiency in shaping techniques transcends craft—it becomes a critical business differentiator with direct implications for profitability, brand reputation, and customer loyalty. In my experience working with multiple handmade brands, I have observed that products exhibiting poor shaping consistently generate higher return rates, negative reviews, and diminished word-of-mouth referrals. A sweater with ill-executed waist shaping that bags at the midsection or a beanie with a crown that puckers unnaturally reflects poorly on the entire brand, regardless of stitch complexity. Conversely, items demonstrating precise, intentional shaping—such as a cardigan with smooth sleeve caps or a bag that maintains its structured silhouette—command premium pricing and inspire repeat purchases. This technical excellence reduces material waste during production; when makers understand how yarn and stitch patterns interact during shaping, they avoid costly errors that require frogging entire sections. Furthermore, businesses that transparently showcase their shaping expertise through educational content—like blog posts dissecting neckline construction or Instagram reels demonstrating invisible decreases—position themselves as authorities in a crowded marketplace. This builds consumer trust and justifies higher price points. For instance, a small brand specializing in custom-fit garments can leverage advanced shaping knowledge to offer made-to-measure services, tapping into lucrative niches underserved by mass production. Ultimately, crochet shaping is not an isolated skill but an integrated component of product development that influences sourcing decisions, production timelines, quality control protocols, and marketing narratives. Investing in shaping mastery yields compounding returns: fewer customer service issues, stronger brand identity, and the ability to innovate beyond generic patterns.
Why Crochet Shaping Resonates in the Crafting Community
The emphasis on crochet shaping within the global crafting community stems from a unique confluence of cultural values, technological accessibility, and the inherent visual nature of the craft. Unlike disciplines where structural elements remain hidden, crochet exposes every stitch, making shaping successes and failures immediately visible—a characteristic that cultivates a collective pursuit of precision. This transparency fuels a vibrant culture of knowledge sharing across platforms like Ravelry, Instagram, and dedicated Facebook groups, where makers routinely post close-up photos of shaping challenges with captions like “Help with sleeve cap decreases!” and receive dozens of actionable suggestions within hours. From attending numerous Crochet Guild of America conferences, I have witnessed how shaping workshops consistently draw the largest crowds, reflecting a community-wide recognition that structural integrity is non-negotiable for professional results. The rise of body-positive crafting movements has further amplified interest in shaping, as makers seek techniques to create garments that flatter diverse body types through strategic darts, curve enhancements, and adaptive modifications. This focus aligns with broader cultural shifts toward mindful consumption and personalized creation—values deeply embedded in the handmade ethos. Additionally, the algorithmic nature of social media rewards visually striking shaping outcomes; a perfectly sculpted amigurumi fox or a seamlessly shaped raglan sweater generates significant engagement, incentivizing makers to refine these skills. Crucially, the crochet community treats shaping not as a rigid formula but as a creative language. Experienced designers often recommend experimenting with unconventional increase placements to achieve organic forms, fostering an environment where technical mastery and artistic expression coexist. This cultural framework ensures that shaping remains a dynamic, evolving conversation rather than a static set of rules, driving continuous innovation and deepening engagement across skill levels.
Essential Tools and Resources for Crochet Shaping
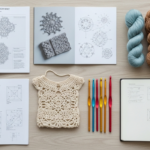
Executing precise crochet shaping demands more than basic hooks and yarn; it requires a curated toolkit designed for accuracy, measurement, and documentation. While beginners might overlook these resources, professional crocheters rely on them to eliminate guesswork and ensure consistency across projects. The following items form the foundation of effective shaping practice:
- Precision Crochet Hooks: Invest in a high-quality set with clearly marked sizes. For shaping-intensive projects, having hooks in 0.5mm increments allows subtle tension adjustments—using a hook 0.5mm larger for decrease rows can prevent puckering without altering overall gauge.
- Locking Stitch Markers: Essential for marking increase/decrease points, especially in circular shaping. Use different colors to denote different shaping sequences (e.g., red for armhole decreases, blue for waist shaping).
- Flexible Tape Measure: A non-stretch fabric tape is critical for checking dimensions during construction. Measure shaped sections against pattern schematics at key intervals to catch deviations early.
- Row Counters: Digital or mechanical counters prevent errors in interval-based shaping (e.g., “decrease every 6th row”). Reset counters at each shaping stage to maintain accuracy.
- Blocking Mats and Rust-Proof Pins: Proper blocking sets shaping permanently. Interlocking foam mats with grid lines help align shaped edges symmetrically during drying.
- Pattern Annotation Tools: Highlighters, sticky notes, and digital PDF annotation apps help dissect complex shaping instructions before beginning.
- Swatch Journal: A dedicated notebook for documenting shaping experiments—yarn used, hook size, stitch counts, and photographic evidence of results—builds invaluable institutional knowledge.
Beyond physical tools, knowledge resources significantly accelerate shaping proficiency. Reputable books like Sweater 101 by Pam Allen or Custom-Fit Hats by Sara Delaney provide foundational principles, while platforms like Craftsy offer video courses demonstrating shaping techniques in real time. In many professional studios, spreadsheet templates calculate shaping intervals based on gauge and target measurements—a practice worth adopting for complex garments. Remember that the most powerful resource remains community: joining forums like the Ravelry Shaping Techniques group provides access to collective problem-solving when unique challenges arise. Investing in these tools and resources minimizes frustration, reduces material waste, and transforms shaping from a source of anxiety into a predictable, repeatable process.
Yarn Selection: How Fiber Affects Shaping
The relationship between yarn properties and shaping outcomes is profound yet frequently underestimated by crocheters. Fiber content, weight, twist direction, and elasticity collectively determine how fabric responds to increases, decreases, and structural stress—factors that can make or break a project’s final form. Wool and wool blends, with their natural crimp and memory, offer exceptional forgiveness in shaping; they stretch during wear and rebound to their original shape, making them ideal for fitted garments requiring precise waist or bust darts. In contrast, plant-based fibers like cotton or linen lack elasticity and will not recover from stretching, demanding more aggressive shaping techniques to achieve similar fit—such as adding extra decrease rows to compensate for inevitable sagging. Acrylic yarns present a middle ground: consistent and affordable, but prone to “growing” with wear if shaping isn’t reinforced through stitch density or blocking.
Yarn weight dramatically influences shaping visibility. Bulky-weight yarns amplify every increase and decrease, creating bold, sculptural effects perfect for statement accessories but potentially overwhelming for subtle garment shaping. Conversely, lace-weight yarns require meticulous stitch counting for effective shaping, as minor errors become invisible until blocking reveals significant distortion. For amigurumi, tightly plied, non-splitting yarns prevent stuffing from protruding through shaped areas like joint articulations. Twist direction also matters: Z-twist yarns (less common) behave differently under tension than standard S-twist yarns, sometimes causing unexpected bias in shaped sections.
From years of testing materials for handmade brands, I have found that swatching with intentional shaping is non-negotiable. Create a 6×6 inch swatch incorporating the exact increase/decrease sequences from your pattern. Observe how the yarn handles transitions: does it pucker at decrease points? Do increases create visible holes? Document these behaviors in your swatch journal alongside washing/blocking tests. For instance, a merino wool swatch might block beautifully into smooth shaping, while the same stitch pattern in bamboo yarn could lose definition when wet. Understanding these nuances allows strategic material selection—choosing a springy wool for a fitted sweater’s waist shaping while reserving drapey silk blends for unshaped shawls. Never assume yarn substitutions will behave identically; the extra swatching time prevents heartbreaking project failures and elevates your work from amateur to artisan.
Skill Level Breakdown: From Beginner to Advanced Shaping
Beginner Shaping Techniques
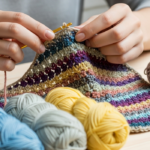
Beginners should focus on foundational shaping methods that build muscle memory without overwhelming complexity. Start with end-of-row increases and decreases to create simple geometric shapes—triangles for shawls, gradual curves for basic beanies, or symmetrical points for dishcloth corners. Master two core techniques: the standard increase (working two stitches into one stitch) and the basic decrease (single crochet two together, or sc2tog). Projects like a scalloped-edge coaster or a child’s beanie provide low-stakes opportunities to practice these skills. Use smooth, medium-weight acrylic yarn in a light color to clearly see stitch definition, and maintain consistent tension by avoiding death grips on the hook. At this stage, perfection is less important than pattern recognition; learn to identify when shaping instructions appear in patterns (“inc 1 st at each end of next row”) and execute them deliberately. Remember that even small projects teach transferable skills—shaping a beanie crown prepares you for sleeve cap decreases later.
Intermediate Shaping Challenges
Intermediate crocheters tackle shaping within rows and circular constructions requiring spatial reasoning. This includes garment elements like waist darts (paired decreases worked symmetrically), sleeve caps (gradual increases mirroring armhole curves), and raglan shaping (simultaneous increases at four points). Techniques expand to include invisible decreases for amigurumi (minimizing seam visibility) and strategic placement of increases to maintain pattern continuity—such as working increases within shell stitches rather than between them. Projects like fitted cardigans, stuffed animals with articulated limbs, or shaped baskets demand careful stitch counting and interval management. At this level, understanding pattern schematics becomes essential; learn to correlate written instructions with visual diagrams to anticipate shaping outcomes. Practice modifying simple patterns—adding waist shaping to a straight-torso sweater—to build confidence. Mistakes are inevitable; view them as diagnostic opportunities to understand how shaping errors propagate through fabric.
Advanced Shaping Mastery
Advanced shaping ventures into architectural manipulation of fabric, requiring anticipation of three-dimensional form from two-dimensional instructions. Techniques include short rows for heel cups or shoulder slopes without visible seams, sculptural shaping for wearables (e.g., creating bust cups through strategic dart placement), and complex garment construction with multiple concurrent shaping sequences (e.g., waist decreases while sleeve increases progress). Mastery involves understanding how stitch orientation affects drape—working stitches through back loops only for vertical shaping emphasis, or alternating increase directions to prevent fabric bias. Designers at this level create original patterns with proportional grading, adjusting shaping intervals based on size rather than applying fixed row counts. This demands deep knowledge of body geometry and yarn behavior; a skilled shaper might swatch six variations of a neckline decrease sequence to achieve the perfect curve. Advanced practitioners also embrace “planned imperfection,” using asymmetrical shaping for organic effects in art pieces or amigurumi. This tier represents the fusion of technical precision and artistic vision, where shaping becomes an expressive language rather than a mechanical task.
Step-by-Step Guide to Mastering Crochet Shaping
Step 1: Deciphering Pattern Instructions Thoroughly
Before making a single stitch, invest time in fully understanding the pattern’s shaping roadmap. Read the entire pattern twice—first for narrative flow, second to highlight all shaping notations with a colored pen. Pay special attention to abbreviations like “inc” (increase), “dec” (decrease), “sc2tog” (single crochet two together), or interval instructions (“dec 1 st at each end every 4th row 5 times”). Cross-reference these with the schematic diagram if provided; note how shaping corresponds to specific garment measurements (e.g., “decrease to 18″ bust width”). For complex projects, create a shaping chart listing row numbers alongside required actions. This preparatory work prevents mid-project confusion when multiple shaping sequences overlap, such as body decreases coinciding with sleeve increases in a raglan sweater. Remember that ambiguous instructions often indicate poor pattern writing—not your skill deficiency; seek supplemental tutorials when needed.
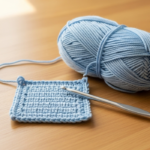
Step 2: Creating a Purposeful Shaping Swatch
Never skip swatching for shaping projects. Crochet a swatch at least 6×6 inches using your exact yarn and hook, but crucially, incorporate the pattern’s specific increase and decrease sequences. For example, if shaping a sleeve cap requires decreasing every other row for eight rows, replicate that sequence in your swatch. Observe how the fabric behaves: do decreases cause noticeable puckering? Do increases create gaps? Measure the swatch before and after blocking to understand dimensional changes. If issues arise, experiment with solutions—try a larger hook for decrease rows, or modify decrease types (e.g., switch from sc2tog to an invisible decrease). Document all variables and outcomes in your swatch journal; this reference becomes invaluable when troubleshooting full projects. For garment shaping, swatch vertically to mimic the direction of shaping forces—horizontal swatches won’t reveal how fabric stretches under its own weight.
Step 3: Executing Increases with Precision
Increases add stitches to expand fabric width or create curves. The standard method—working multiple stitches into one stitch (e.g., “2 sc in next st”)—requires attention to placement to avoid holes. For clean increases, insert your hook under both loops of the designated stitch, maintaining consistent tension with surrounding stitches. In amigurumi, use the invisible increase: work the first stitch normally into the stitch, then work the second stitch only into the back loop of the same stitch. This minimizes visible gaps at increase points. When shaping curves (like hat crowns), stagger increase placement across rounds to prevent hexagonal distortion—instead of increasing in the same stitch position each round, offset increases by one or two stitches in subsequent rounds. For patterned fabrics, integrate increases within stitch repeats rather than between them to maintain visual continuity; for instance, in a shell stitch pattern, add extra stitches to the center of the shell rather than at its edges.
Step 4: Mastering Decreases Without Distortion
Decreases reduce stitch count to narrow fabric or create angles. Basic decreases like sc2tog create a slight right-leaning slant; for symmetrical shaping (e.g., center back necklines), pair left- and right-leaning decreases or use centered techniques. The centered double decrease—slip stitch to the next stitch, yarn over, insert hook into following stitch, pull up a loop, yarn over pull through two loops twice—creates a vertical decrease ideal for symmetrical shaping. To prevent puckering during decreases, consciously relax your tension on decrease rows; many crocheters inadvertently tighten when concentrating on technique. For seamless shaping in garments, work decreases one stitch in from edges to maintain clean selvedges for seaming. In circular shaping (like hat crowns), decrease gradually—switching from decreasing every round to every other round near the end creates a smooth dome rather than a pointed tip. Always count stitches immediately after completing a decrease row to catch errors before they compound.
Step 5: Navigating Circular Shaping Dynamics
Shaping in the round follows distinct principles from flat shaping. For flat circles (hat brims, bag bases), the foundational rule is increasing by six stitches per round for single crochet to maintain flatness—but this creates hexagons if increases align vertically. Stagger increase placement: in Round 1, increase in every stitch; Round 2, work one stitch even between increases; Round 3, work two stitches even between increases, and so forth. For tubular shaping (sleeves, hat bodies), cease increases once the desired circumference is reached, then work straight. Crown shaping requires strategic decrease intervals: begin with decreases every other round for gradual tapering, transitioning to decreases every round near the finish. Use stitch markers to divide the round into equal segments (e.g., six markers for a six-segment crown), decreasing at each marker to maintain symmetry. For seamless raglan shaping, place four markers denoting front/back/sleeve divisions, then increase at each marker every other round while maintaining pattern continuity across increase points.
Step 6: Blocking to Set and Refine Shape
Blocking is not optional for shaped items—it is the final, critical step that defines and stabilizes your shaping work. For most fibers, wet blocking delivers best results: submerge the item in lukewarm water with mild soap, gently squeeze (never wring), roll in a towel to remove excess moisture, then pin to exact measurements on a blocking mat. Pay special attention to shaped areas—gently stretch neckline curves to pattern specifications, ensure sleeve caps match armhole dimensions, and align symmetrical elements like waist darts. For delicate fibers like silk or alpaca, use spray blocking: pin the item dry to shape, then mist thoroughly with water until saturated. Steam blocking works well for wool but requires caution—hold the steamer several inches away to avoid felting. Allow items to dry completely before removing pins; rushing this step causes shape reversion. Blocking relaxes stitches, evens tension inconsistencies from shaping rows, and enhances drape—transforming a technically correct but stiff piece into a professionally finished object.
Common Crochet Shaping Mistakes and Solutions
Inconsistent Tension During Shaping Transitions
Many crocheters unconsciously tighten their grip when executing increases or decreases, causing ripples, puckering, or stiff sections that disrupt fabric flow. This is especially problematic in garment shaping where tension variations create unsightly horizontal lines. Solution: Practice shaping techniques on swatches while consciously monitoring hand tension. Place a reminder note nearby: “Relax shoulders.” For persistent puckering at decrease points, try using a hook 0.5–1.0mm larger exclusively for decrease rows—this slight adjustment often yields smoother transitions without altering overall gauge.
Stitch Count Errors Compounding Over Rows
Miscounting stitches during shaping sequences is a frequent beginner error that compounds rapidly—a single missed decrease in row 10 might cause a 2-inch fit discrepancy by row 30. Solution: Implement a multi-layer verification system. Use locking stitch markers to denote shaping points, count stitches aloud after every shaping row, and employ a row counter dedicated solely to shaping intervals. For complex patterns, create a spreadsheet tracking expected stitch counts per row; deviations become immediately apparent. If an error is discovered mid-project, assess whether it affects structural integrity before deciding to frog—minor count variations in non-critical areas might be disguised through strategic blocking.
Ignoring Yarn-Specific Shaping Behavior
Assuming all yarns respond identically to shaping leads to predictable failures—cotton sweaters stretching beyond recognition or acrylic toys losing shape after minimal play. Solution: Always conduct a shaping-specific swatch as described earlier. Document how your chosen yarn handles increases (do holes form?), decreases (does it pucker?), and blocking (does it retain shape?). For problematic yarns, adapt techniques: use tighter decreases for slippery fibers, or incorporate stabilizing elements like crochet thread linings for stretch-prone yarns in structural areas. When substituting yarns in patterns, prioritize fiber behavior over weight alone—replacing wool with cotton requires reshaping calculations, not just gauge matching.
Neglecting Mid-Project Fit Assessments
Garment crocheters often wait until assembly to try on pieces, discovering fit issues too late for easy correction. A waist that seemed adequate on paper might prove too tight after seaming. Solution: Schedule intentional fit checks during construction. For bottom-up sweaters, try on the body after completing the lower shaping but before armhole decreases. For top-down garments, assess fit after completing the yoke shaping but before separating sleeves. Pin or clip seams temporarily to simulate finished dimensions. This allows minor adjustments—adding or removing a few decrease rows—while the piece remains easily modifiable. Document these adjustments for future pattern grading.
Overlooking Blocking’s Role in Shape Definition
Skipping blocking leaves shaping undefined and amateurish, particularly in lace or draped garments where fabric memory is essential. Solution: Treat blocking as non-negotiable. Allocate dedicated time and space for proper blocking after every shaped project. For items requiring precise measurements (like garment pieces destined for seaming), block each component individually to exact schematic dimensions before assembly. This ensures seams align perfectly and the final garment drapes as intended. Remember that blocking isn’t just about size—it relaxes fibers to reveal the true character of your shaping work.
Advanced Tips from Professional Crocheters
Experienced designers employ nuanced techniques that elevate shaping beyond textbook methods. One powerful approach is strategic short-row shaping for seamless contours—working partial rows to build fabric depth without visible seams. This technique excels for shoulder slopes, heel cups in socks, or creating subtle bust shaping in seamless garments. Rather than traditional wrap-and-turn methods common in knitting, crochet short rows use “wrapless” techniques: work to the turning point, turn, chain 1 (or appropriate turning chain), and work back, leaving unworked stitches to be incorporated later with slip stitches or invisible joins. This creates smooth, professional curves invisible from the right side.
Another pro insight involves integrating shaping directly into stitch patterns rather than treating it as an interruption. For example, in a cable-look stitch pattern, modify cable crosses to incorporate increases—adding an extra stitch within the cable twist creates organic expansion that maintains pattern integrity. Similarly, when working textured stitches like bobbles or popcorns, place them strategically at increase points to disguise shaping transitions while adding visual interest. From consulting with multiple crochet brands, I’ve observed that the most successful designers document not just shaping instructions but the rationale behind them—”Decrease here to accommodate natural shoulder slope” builds maker confidence and reduces support queries.
Proportional grading represents another advanced skill often overlooked in amateur patterns. Instead of applying identical shaping intervals across all sizes (e.g., “decrease every 6th row” for XS–3X), calculate shaping based on target measurements and gauge. A larger size might require decreases every 8th row to achieve the same relative waist reduction as a smaller size’s every-6th-row schedule. This preserves design intent across sizes—a critical factor for commercial pattern success. Finally, embrace controlled asymmetry for artistic effect: slightly uneven increase placement in organic shapes like leaves or animal ears enhances realism, a technique mastered by high-end amigurumi artists. These advanced approaches transform shaping from mechanical execution to intentional design language.
Real-World Applications of Crochet Shaping
Consider a hypothetical but realistic scenario: a small handmade business specializing in custom-fit cardigans for curvy figures. By implementing advanced waist and bust shaping through strategic dart placement and proportional grading, they achieve a 40% reduction in fit-related returns compared to industry averages. Their marketing emphasizes “shaping that celebrates your silhouette,” attracting customers frustrated by mass-produced ill-fitting garments. This technical excellence becomes their unique selling proposition, allowing premium pricing and fostering a loyal community that shares photos of perfectly fitted makes online—organic marketing worth thousands in advertising value.
In the amigurumi sphere, a designer created a series of endangered animal toys where anatomical accuracy relied entirely on precise shaping. A snow leopard required subtle increases for muscular shoulders, gradual decreases for tapered legs, and asymmetric shaping for the distinctive head profile. These technically demanding pieces sold out within hours of release, with collectors praising the lifelike structure. The designer attributed success not to complex stitches but to “obsessive attention to shaping mathematics”—calculating exact increase intervals based on reference photos and creating custom shaping charts for each species.
A more profound application emerged from a community initiative where volunteers crocheted post-mastectomy breast forms. Success depended entirely on empathetic shaping: creating natural teardrop silhouettes with weighted bottoms for realistic movement, using layered shaping techniques to mimic tissue density variations. Volunteers received detailed shaping guides developed with medical advisors, transforming a simple craft project into a tool for restoring confidence. These examples illustrate how technical shaping mastery transcends aesthetics—it enables commercial differentiation, artistic expression, and meaningful social impact when applied with intention and expertise.
Customizing Shaping for Unique Projects
Once foundational shaping principles are mastered, customization unlocks limitless creative potential. For garment adaptation, modify shaping intervals to match personal measurements rather than blindly following patterns. If a sweater pattern calls for waist decreases every sixth row but your torso measures two inches shorter than the schematic, decrease every fourth row to achieve equivalent shaping within your dimensions. Always recalculate total stitch reduction to maintain the intended final measurement—reducing the interval frequency requires proportionally fewer total decreases.
In home decor, apply shaping principles unconventionally: create a sculptural fruit bowl by working rapid increases for a wide base, then dramatic decreases for steep sides, using a stiff cotton yarn that holds its shape without lining. For toys, exaggerate shaping for stylistic effect—triple the standard increase rate for a cartoon character’s bulbous nose, or use asymmetrical decreases to craft a lopsided, whimsical mushroom cap. When modernizing vintage patterns with outdated shaping (like boxy 1970s sweaters), incorporate contemporary techniques: replace stepped decreases with gradual shaping for smoother waist definition, or add subtle bust darts through short-row shaping.
Colorwork offers another customization avenue: in tapestry crochet, change colors precisely at increase points to highlight contours—using a contrasting color for the center stitch of an increase sequence draws the eye to the shaped curve. For wearable art, combine shaping with surface crochet to create dimensional embellishments; shape a rose by working tight spiral increases in the center, then looser petal-shaped increases radiating outward. The key to successful customization is iterative prototyping: sketch your vision, calculate approximate stitch counts based on gauge, swatch the shaping sequence at 50% scale, then refine before committing to the full project. View shaping not as constraint but as your primary design tool for translating imagination into tangible form.
Caring for Shaped Crochet Items
Proper care preserves the structural integrity of carefully shaped crochet items, ensuring they maintain their intended form through years of use. Always consult yarn labels first, but general principles apply across fiber types. Hand-washing in cool water with pH-neutral detergent is safest for shaped garments; machine agitation can distort delicate shaping, especially in areas like sleeve caps or waist darts. Never wring shaped items—this stretches fibers permanently. Instead, gently press water out, then roll in a clean towel to absorb moisture.
Drying technique critically impacts shape retention. Lay items flat on a mesh drying rack, reshaping to exact original dimensions while damp. For complex shapes like stuffed toys or sculptural accessories, use blocking mats with grid lines to ensure symmetrical drying—pin curved edges gently to maintain contours without overstressing fibers. Avoid hanging shaped garments to dry; gravity stretches shoulders, necklines, and waist shaping over time. For wool items requiring refresh between washes, light steam blocking (holding iron several inches away) can revive shape without full immersion.
Storage practices complete the care cycle. Fold shaped garments rather than hanging them; padded hangers still create shoulder bumps in delicate fabrics. Store in breathable cotton bags with cedar blocks to deter pests—never use plastic bags that trap moisture and encourage mildew. For seasonal items like shaped winter hats, stuff crowns lightly with acid-free tissue paper to maintain dome shape during storage. Periodically inspect stored items and re-block if needed; humidity fluctuations can gradually distort shaping even in ideal conditions. Including simple care instructions with handmade gifts or sales items (“Lay flat to dry to preserve shape”) demonstrates professionalism and extends your work’s lifespan—honoring the craftsmanship invested in its creation.
Monetizing Crochet Shaping Skills
Mastery of crochet shaping opens diverse, sustainable monetization pathways that leverage expertise rather than undervaluing labor through finished goods sales alone. Digital pattern creation represents the most scalable opportunity; crafters actively seek well-graded patterns with clear, detailed shaping instructions. Focus on underserved niches—such as adaptive clothing with strategic shaping for mobility devices or size-inclusive garments with proportional grading—and include schematic diagrams with shaping annotations. Platforms like Ravelry and Etsy reward patterns that solve specific problems, like “seamless sleeve cap shaping for broad shoulders,” allowing premium pricing ($6–12 per pattern) with minimal ongoing effort after creation.
Educational content generation builds authority while generating revenue. Develop online courses teaching specific shaping techniques—”Mastering Invisible Decreases for Professional Amigurumi” or “Garment Shaping Without Seams”—hosted on platforms like Teachable or Skillshare. Supplement with a blog or YouTube channel offering free shaping tutorials that funnel viewers toward paid offerings. For instance, a free video on “Basic Waist Shaping” can promote a comprehensive course on full garment construction. Affiliate marketing integrates naturally; recommend specific tools (like ergonomic hooks for tension control during shaping) with trackable links.
Workshop facilitation—virtual or in-person—commands higher per-student revenue. Structure sessions around tangible outcomes: “Shape a Perfect-Fit Beanie in 90 Minutes” or “Sculptural Shaping for Amigurumi Artists.” Partner with local yarn shops for venue access or host virtual intensives via Zoom. Collaborations with yarn companies offer additional streams; brands sponsor content showcasing their yarns in shaping-intensive projects, valuing authentic demonstrations of fiber performance. Crucially, monetization must stem from genuine expertise—share your shaping journey transparently, including past mistakes and solutions. This authenticity builds trust that converts followers into customers without aggressive sales tactics. Position yourself as a reliable resource first; revenue follows naturally as your authority grows.
Frequently Asked Questions About Crochet Shaping
What is the easiest project to practice basic shaping techniques?
Begin with a simple beanie worked in the round. The crown shaping—gradual decreases creating a dome—teaches fundamental decrease placement and interval management without overwhelming complexity. Use worsted weight yarn and a appropriately sized hook for clear stitch definition. This project builds confidence for more advanced shaping while yielding a wearable result.
How can I fix a shaping mistake without unraveling the entire project?
Minor shaping errors can sometimes be disguised through strategic blocking—gently stretching or compressing the fabric while damp to redistribute stitches. For localized errors (e.g., one missed decrease), carefully snip a single stitch below the mistake with small embroidery scissors, then unravel only that section to correct it. Prevention remains superior: count stitches after every shaping row and use stitch markers to flag critical points.
Can I design my own shaped patterns without advanced math skills?
Absolutely. Start by modifying existing patterns—adjusting decrease intervals to change fit—before creating from scratch. Use proportional scaling: if a 40-inch bust requires 10 decrease rows, a 44-inch bust might need 12 rows spaced slightly farther apart. Free tools like the Crochet Calculator app handle basic arithmetic. Sketch your desired shape on graph paper first, translating curves into stitch increases/decreases visually before calculating counts.
Why do my decreases always create visible holes or puckers?
Puckering typically results from tight tension during decreases or using a hook size too small for the yarn’s elasticity. Holes often occur when increases aren’t worked into both loops of the stitch below. Solutions: consciously relax your grip during decrease rows, try a hook 0.5mm larger exclusively for decrease sequences, and ensure increases are worked under both loops unless pattern specifies otherwise. Swatching with intentional shaping reveals yarn-specific solutions before committing to large projects.
How does shaping differ between crochet and knitting?
Crochet shaping tends to be more pronounced due to taller stitches and less inherent drape; increases/decreases create sharper angles unless carefully executed. Knitting allows subtler shaping through stitch manipulation within rows (like make-one increases) without adding full stitches. Crochet relies more heavily on strategic stitch placement and blocking to achieve fluid curves. Both crafts require understanding fabric behavior, but crochet shaping often demands more deliberate planning due to its structural nature.
Is blocking truly necessary for all shaped items?
Blocking is essential for any item where shape definition impacts function or aesthetics—garments, amigurumi, and structured accessories. It sets shaping permanently, evens tension inconsistencies from shaping rows, and enhances drape. Simple accessories like scarves with minimal shaping may skip blocking, but for anything requiring precise dimensions (sleeve caps, waist shaping, toy limbs), blocking transforms technically correct work into professionally finished pieces. Consider it the final, non-optional step in the shaping process.
Conclusion
Mastering crochet shaping and structure represents one of the most transformative journeys in a crocheter’s development—elevating work from technically proficient to professionally exceptional. This guide has equipped you with comprehensive knowledge spanning foundational techniques, material considerations, business applications, and advanced customization strategies. Remember that shaping mastery emerges not from memorizing rules but from understanding principles: how stitches interact under tension, how fibers respond to manipulation, and how three-dimensional form emerges from two-dimensional instructions. Embrace mistakes as diagnostic opportunities; each puckered decrease or misshapen curve teaches more than perfect execution ever could. As you apply these concepts—whether refining a sweater’s fit, sculpting an amigurumi character, or developing original patterns—you’ll notice profound shifts in your work’s quality, your confidence as a maker, and the respect your creations command. The crochet community thrives on shared knowledge; consider documenting your shaping experiments to inspire others. Ultimately, shaping is where craft becomes artistry—the intentional manipulation of thread to honor the human form or express creative vision. Keep practicing, keep questioning, and keep shaping with purpose. Your next project awaits, ready to be transformed by the power of intentional structure.

Anne Williams is a passionate crochet artist who finds purpose and expression through yarn and handmade creations. Driven by creativity and a love for the art of crochet, she transforms ideas into unique pieces, blending patience, care, and authenticity. Always eager to explore new techniques and inspire others, Anne believes crochet is a way to slow down, tell stories, and create beauty with meaning.