Testing crochet patterns is a fundamental practice that separates amateur designs from professional-grade creations. For anyone involved in the crochet industry—be it independent designers, yarn companies, or handmade sellers—implementing a thorough testing process is non-negotiable for maintaining quality and credibility. This guide provides an in-depth exploration of pattern testing, covering its business implications, required resources, methodologies, and advanced strategies. By mastering the art of testing crochet patterns, you can significantly reduce errors, enhance user satisfaction, and position your brand as a leader in the crafting community. Whether you’re preparing to test your first pattern or looking to refine an existing protocol, the insights herein will equip you with actionable knowledge to elevate your work. The digital age has transformed pattern distribution, making accuracy more critical than ever. With patterns sold globally via PDF downloads, there’s no room for ambiguity or mistakes that could frustrate international customers. Pattern testing acts as a quality assurance checkpoint, ensuring that instructions are clear, stitch counts are correct, and the final product matches the designer’s vision. Moreover, testers often provide feedback on yarn substitutions, hook size adjustments, and skill level appropriateness, which enriches the pattern’s usability. This collaborative approach not only improves the immediate design but also fosters a sense of community among crafters. In the following sections, we’ll dissect every aspect of testing crochet patterns to provide you with a comprehensive toolkit for success.
What Testing Crochet Patterns Means for Crochet and Knitting Businesses
For businesses operating in the handmade sector, pattern testing is a strategic investment that yields substantial returns in customer trust and operational efficiency. When a crochet pattern is released without adequate testing, the consequences can range from minor customer confusion to complete project failure, leading to negative reviews and diminished brand reputation. In contrast, patterns that undergo rigorous testing are more likely to result in successful projects, satisfied customers, and positive word-of-mouth marketing. From working with multiple crochet brands, I’ve observed that companies which prioritize testing often experience lower return rates on digital products and higher customer retention. For example, a small business selling amigurumi patterns might use a team of testers to verify each step, ensuring that even beginners can follow along without frustration. This attention to detail translates directly into five-star reviews and repeat purchases. Additionally, the feedback gathered during testing can inform future product development, helping businesses identify popular styles, preferred difficulty levels, and common pain points among their audience. Thus, pattern testing serves not only as a quality control measure but also as a valuable source of market intelligence. Beyond immediate quality assurance, pattern testing contributes to long-term brand building. In a crowded marketplace, a reputation for accuracy and reliability can differentiate a business from competitors. Customers are more willing to pay premium prices for patterns they trust to work correctly the first time. Furthermore, involving a diverse group of testers—including those with varying skill levels, yarn preferences, and geographic locations—ensures that patterns are accessible and adaptable worldwide. This inclusivity enhances the brand’s appeal and broadens its customer base. For knitting businesses, similar principles apply, though the techniques differ; the core concept of pre-release validation remains universal. Ultimately, integrating pattern testing into the business workflow is a hallmark of professionalism that pays dividends in customer loyalty and brand authority.
Why Pattern Testing Works Especially Well in the Crochet Community

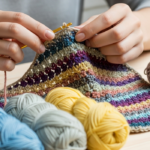
The crochet community is uniquely positioned to benefit from pattern testing due to its collaborative and supportive nature. Unlike some crafts that may be more solitary, crochet thrives on online forums, social media groups, and local guilds where crafters readily share tips, troubleshoot issues, and celebrate each other’s work. This culture of openness makes it easy to recruit testers and gather honest feedback. Experienced designers often recommend leveraging community platforms like Ravelry or Instagram to find testers who match the target demographic for a new pattern. For instance, when testing a complex lace shawl, a designer might seek out advanced crocheters within specialized groups to ensure the pattern is challenging yet achievable. The feedback loop in such communities is rapid and constructive, allowing designers to make iterative improvements before public release. Moreover, testers often become brand advocates, promoting the final pattern to their networks and generating organic buzz. This symbiotic relationship strengthens community bonds while elevating pattern quality. In many cases, the testing phase itself becomes a mini-event, with testers sharing progress photos and encouraging each other, which builds anticipation for the launch. Thus, pattern testing not only refines the product but also engages and grows the community around a brand. The communal aspect also provides emotional support; testers frequently help one another navigate tricky sections, creating a sense of shared accomplishment. This dynamic is less prevalent in more individualistic crafts, making crochet particularly fertile ground for collaborative testing practices that yield richer, more resilient patterns.
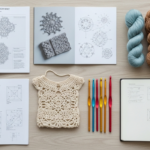
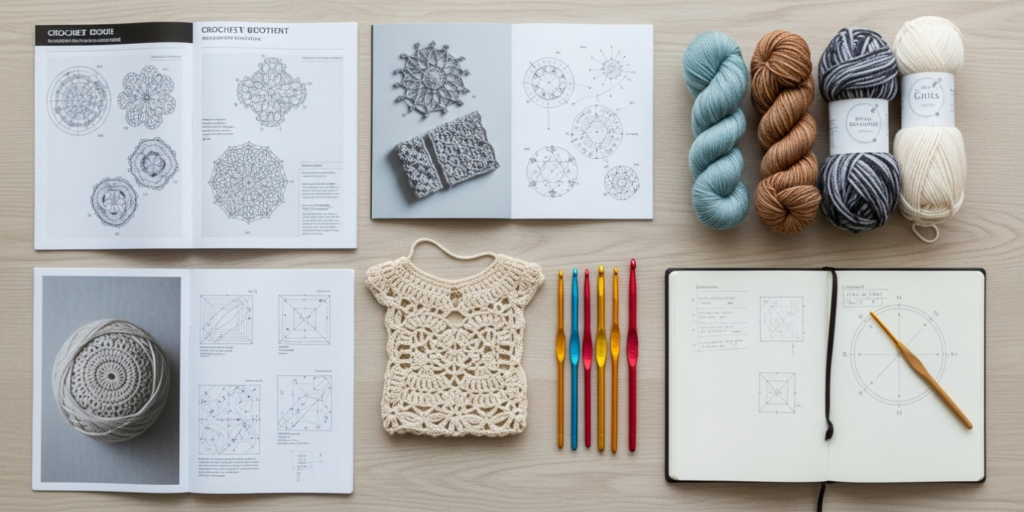
Materials, Tools, and Resources Needed for Pattern Testing
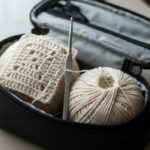
Effective pattern testing requires more than just yarn and a hook; it demands a systematic approach with the right tools for documentation and communication. Essential materials include a variety of yarn weights and fiber types to test substitutions, multiple hook sizes for gauge adjustments, and measuring tools like tape measures and stitch counters. Beyond physical tools, digital resources are crucial: spreadsheet templates for tracking tester feedback, photo-sharing platforms for visual documentation, and communication channels like email groups or private Facebook groups to coordinate the testing process. From my experience, the most successful testing rounds utilize a combination of structured forms and open-ended feedback options to capture both quantitative data (e.g., stitch counts) and qualitative insights (e.g., clarity of instructions). Testers should also have access to the designer for clarification, though the pattern should ideally stand on its own. Investing in quality tools upfront prevents misunderstandings and streamlines the feedback collection process. For instance, providing testers with a standardized feedback form ensures that all critical aspects—such as yarn usage, time spent, and difficulty level—are consistently evaluated. This organized approach not only saves time but also yields more actionable data for pattern refinement. Additionally, resources like stitch dictionaries, gauge calculators, and blocking mats can enhance the testing accuracy, especially for garments where fit is paramount. Designers should curate a toolkit that addresses the specific needs of their patterns, whether it’s for amigurumi, wearables, or home decor items. The key is to equip testers with everything they need to provide thorough, reliable feedback without unnecessary complexity. A well-prepared tester is an effective tester, and thoughtful resource allocation demonstrates respect for their time and contribution.
Yarn Types and Fiber Considerations in Pattern Testing
Yarn selection plays a pivotal role in pattern testing, as fiber content and weight directly impact gauge, drape, and the final appearance of the project. When testing a crochet pattern, it’s essential to consider how different yarns behave; for example, cotton yarns may stretch more than acrylics, affecting garment fit, while wool fibers have memory that helps maintain shape. Experienced testers often recommend using the yarn specified in the pattern for the initial test to establish a baseline, then experimenting with substitutions to assess versatility. Fiber considerations extend to care instructions; a pattern for a baby blanket should be tested with machine-washable yarns to ensure practicality. Moreover, dye lots and color variations can influence the outcome, so testers should note any discrepancies. In many crochet businesses, designers provide testers with yarn kits to maintain consistency, but when substitutions are allowed, clear guidelines on acceptable alternatives prevent skewed results. Understanding how yarn properties interact with stitch patterns is crucial; a lace design might require a smooth, non-splitting yarn to showcase detail, whereas a textured stitch benefits from a fuzzy fiber. By systematically evaluating yarn variables during testing, designers can include accurate substitution advice in the final pattern, enhancing its usability for a broader audience. Natural fibers like silk or linen behave differently than synthetics under tension, which can alter drape in shawls or sweaters. Testers should document how the yarn responds to blocking, as this step often reveals hidden issues with fiber stability. Additionally, ethical considerations such as sustainability or animal welfare may influence tester preferences, providing designers with insights into market trends. A comprehensive yarn evaluation during testing transforms a functional pattern into a versatile resource that empowers crafters to make informed material choices.
Skill Level Breakdown for Pattern Testers
Not all testers are created equal; matching tester skill levels to pattern complexity is vital for effective feedback. Patterns should be tested by crafters whose abilities align with the intended audience to ensure instructions are appropriate and achievable. This stratification prevents overwhelming beginners with advanced techniques or boring experts with overly simplistic directions, resulting in feedback that accurately reflects the target user experience.
Beginner Testers
Beginner testers are ideal for simple patterns like dishcloths, basic scarves, or amigurumi with minimal shaping. They provide invaluable insights into whether foundational instructions are clear, such as how to hold the hook or execute basic stitches. Their feedback often highlights areas where experienced designers might overlook explanatory gaps. For instance, a beginner might struggle with terms like “front loop only” if not defined, prompting the designer to add glossary entries. Engaging beginners in testing also fosters inclusivity and helps grow the next generation of crocheters. These testers typically focus on whether the pattern builds confidence, with feedback centered on step-by-step clarity and encouragement. Designers should provide extra support resources for beginner testers, such as video links for unfamiliar techniques, to ensure their feedback stems from pattern quality rather than skill gaps.
Intermediate Testers
Intermediate testers handle patterns with moderate complexity, such as garments with shaping, colorwork, or stitch patterns requiring counting. They can assess whether increases/decreases are well-explained and if charts complement written instructions. Their feedback bridges the gap between novice and expert, identifying challenges that might deter advancing crafters. For example, an intermediate tester might suggest breaking down a complex round into smaller steps for better comprehension. These testers often catch inconsistencies in stitch counts across repeated sections and evaluate whether the pattern’s pacing maintains engagement without frustration. They are particularly adept at spotting where a designer’s assumptions about prior knowledge create stumbling blocks, making their input essential for patterns targeting the broad middle market of crafters.
Advanced Testers
Advanced testers tackle intricate designs like lace shawls, cables, or mathematical constructions. They focus on precision, error-checking stitch counts over long repeats, and evaluating the designer’s technical choices. Their expertise allows them to spot subtle errors that less experienced testers might miss, such as inconsistent tension leading to gauge issues. Advanced testers also provide insights on efficiency, suggesting stitch optimizations without compromising the design. They often test under time constraints or with intentional distractions to simulate real-world conditions, revealing whether complex instructions hold up under pressure. Their feedback tends to be highly technical, addressing mathematical accuracy, structural integrity, and professional finishing techniques. For high-end or competition-level patterns, advanced testers are indispensable for ensuring the design meets exacting standards.
By stratifying testers according to skill level, designers ensure comprehensive coverage of potential user experiences, resulting in patterns that cater accurately to their target market. This tiered approach also helps designers calibrate difficulty ratings, preventing mismatches that lead to customer dissatisfaction.
Step-by-Step Guide to Testing Crochet Patterns
Testing a crochet pattern is a methodical process that, when followed diligently, uncovers errors and refines clarity. Below is a comprehensive, step-by-step methodology employed by professional testers and designers. Adherence to this protocol transforms casual crafting into a valuable quality assurance practice.
Step 1: Pre-Testing Preparation
Before making a single stitch, thorough preparation sets the stage for success. First, review the entire pattern to understand the project scope, required materials, and estimated time commitment. Gather all specified yarns, hooks, and notions, verifying that you have sufficient quantities—purchase extra yarn to account for swatching and potential errors. Create a dedicated testing kit that includes a printed or digital copy of the pattern (on a device with reliable battery life), a dedicated notebook or digital document for notes, a camera or smartphone for progress photos, stitch markers, a tape measure, and scissors. Establish clear communication channels with the designer, confirming deadlines, preferred feedback format, and protocols for asking questions. This preparatory phase minimizes disruptions during active testing and ensures all variables are controlled. Experienced testers often schedule specific crafting sessions in their calendars to maintain consistent progress without rushing.
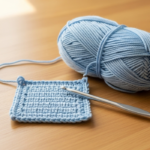
Step 2: Creating a Gauge Swatch
Gauge is the cornerstone of accurate crochet, especially for wearables. Using the recommended hook and yarn, crochet a swatch at least 4×4 inches in the specified stitch pattern. Work beyond the measured area to account for edge distortion. Measure the number of stitches and rows per inch in the center of the swatch, comparing it to the pattern’s gauge. If discrepancies exist, adjust hook size incrementally and re-swatch until gauge matches. Document the exact hook size used, yarn lot number, and any environmental factors like humidity that might affect tension. For non-garment items, swatching still provides insight into drape and texture. Skipping this step risks a finished item that is too large or small, rendering the test invalid. In many professional testing scenarios, designers require swatch photos before testers proceed to the main project to verify baseline consistency.
Step 3: Executing the Pattern Step by Step
Begin crocheting the project exactly as written, resisting the urge to “intuit” corrections based on experience. Follow each instruction sequentially, noting any confusion, ambiguity, or errors immediately in your log. For instance, if a row instructs “repeat from * to * 10 times” but the stitch count doesn’t align after completion, record the discrepancy with row number and expected versus actual counts. Take photos at key stages—after completing major sections, before assembly, and during tricky transitions—to provide visual context for feedback. Pay meticulous attention to yarn consumption; weigh the yarn before starting and after completion to verify yardage estimates. Note any points where you had to frog (rip out) work due to unclear instructions, as these represent critical failure points for end users. Maintain your natural tension; don’t artificially tighten or loosen stitches to force the pattern to work.
Step 4: Documenting Feedback in Real-Time

As you work, maintain a running log of observations using a structured template if provided. Categories should include: Clarity of Instructions (rate each section), Stitch Count Accuracy (verify after every row/round), Yarn Usage (actual vs. estimated), Time Spent per Section, Difficulty Spikes, and Overall Flow. Be specific: instead of “this part was confusing,” write “Row 27’s instruction ‘dc in next 3 sts, ch 1, skip 1’ resulted in 2 extra stitches; suggest clarifying whether the chain space counts as a stitch.” Timestamp your sessions to help designers set realistic completion estimates. Note environmental factors like lighting conditions that affected readability. This contemporaneous documentation prevents memory fade and ensures feedback accuracy. Professional testers often use voice memos during crafting for immediate capture of frustrations or insights, transcribing them later.
Step 5: Blocking and Final Assessment
Upon completion, block the finished object according to fiber content to see the true drape, dimensions, and stitch definition. For garments, measure against the pattern’s schematic at key points: bust, waist, sleeve length, and overall length. Compare these measurements to intended sizing, noting any deviations. Assess the overall aesthetic: does it match the designer’s sample photo in terms of shape and texture? Evaluate wearability or functionality—does a bag strap sit comfortably? Does a shawl drape as expected? Compile all notes, photos, measurements, and yarn details into a comprehensive report. Include constructive suggestions for improvement, not just error reports. For example, “The edging instructions were clear, but adding a note about blocking before seaming would prevent curling.”
Step 6: Post-Testing Communication
Submit feedback promptly via the agreed-upon method, typically a shared document or email. Participate in any follow-up discussions; designers may seek clarification on certain points, so being available for brief consultations enhances collaboration. After revisions, some testing rounds include a second phase where testers verify fixes on specific sections, ensuring all issues are resolved without introducing new errors. Maintain professionalism throughout—remember that designers invest significant creative energy, and feedback should be respectful even when critical. This meticulous approach transforms pattern testing from a casual activity into a professional practice that significantly elevates pattern quality and user experience.
Common Mistakes in Crochet Pattern Testing and How to Avoid Them
Even experienced testers can fall into pitfalls that compromise the testing process. Awareness of these common errors enables more effective contributions and preserves the integrity of the feedback loop.
- Skipping the Gauge Swatch: Many testers, eager to start the project, omit swatching, leading to size inaccuracies that invalidate the entire test. Always swatch; it’s non-negotiable for wearables and highly advisable for all projects to ensure consistency. To avoid this, make swatching the first official step of testing and photograph it for submission.
- Assuming Instead of Following Instructions: Testers sometimes “correct” perceived errors based on experience, which masks actual pattern flaws. For example, automatically working a decrease differently because “that’s how it’s usually done” prevents the designer from discovering an instruction error. Resist this urge; follow the pattern verbatim to expose genuine issues. If something seems wrong, note it as feedback rather than self-correcting.
- Vague Feedback: Comments like “this was confusing” or “I didn’t like this part” lack actionable value. Designers cannot fix unspecified problems. Instead, specify exactly which step, row number, or term caused confusion and suggest concrete improvements. For instance, “Row 15: ‘sc2tog’ abbreviation wasn’t defined in glossary; recommend adding it before this row.”
- Ignoring Yarn Substitutions: Testing with vastly different yarns without documentation skews results. If substituting, record fiber content, weight, yardage, and any hook adjustments made. This contextualizes feedback—e.g., “Used cotton instead of acrylic; drape was heavier, but stitch definition improved.” Never substitute without designer permission unless explicitly allowed.
- Rushing the Process: Hastily completed tests miss subtle errors like inconsistent stitch counts over long repeats. Allocate sufficient time to work at a natural pace, allowing for careful observation. Schedule testing sessions when you’re alert and minimally distracted. Quality trumps speed in testing.
- Neglecting Documentation: Failing to take photos or notes in real-time leads to forgotten details. Maintain a contemporaneous log; memory is unreliable after project completion. Use a dedicated notebook or digital app that timestamps entries.
- Overlooking Finishing Techniques: Assembly, seaming, and edging instructions are often error-prone yet critical to final appearance. Test these steps thoroughly, as they significantly impact user satisfaction. Note whether seaming instructions produce invisible joins or if edging lies flat without puckering.
By avoiding these mistakes, testers provide higher-quality feedback that designers can act upon confidently, ultimately elevating the entire pattern ecosystem.
Advanced Tips and Professional Insights for Pattern Testers
Beyond basic testing, seasoned professionals employ strategies that yield deeper insights and foster stronger designer-tester relationships. Experienced designers often recommend that testers work on multiple samples if time permits, as this reveals consistency issues—a single swatch might hide a counting error that becomes apparent when repeating the motif three times. For example, making two identical granny squares might uncover a miscount in the corner repeat sequence that wasn’t evident in isolation. Another pro tip is to test patterns under varied conditions—such as different lighting environments or while multitasking with a podcast—to simulate real-world crafting scenarios where attention may waver. This helps identify instructions that require intense concentration versus those that flow naturally during relaxed crafting. Additionally, advanced testers cross-reference patterns with industry standards; for instance, ensuring abbreviations align with Craft Yarn Council guidelines to avoid confusion among international users. From working with top crochet brands, I’ve learned that the most valuable testers not only spot errors but also suggest enhancements, like adding a chart for visual learners alongside written instructions or breaking long paragraphs into bullet points for readability on mobile devices. Furthermore, maintaining a personal testing journal to track patterns tested, yarns used, hook tensions, and lessons learned builds expertise over time. This reflective practice transforms testing from a one-off task into a skill that continuously improves. Lastly, fostering a respectful, constructive tone in feedback—even when critiquing—is essential for positive designer-tester relationships. Phrases like “I found Row 22 challenging because…” rather than “This row is poorly written” maintain collaboration. Designers remember testers who provide thoughtful, solution-oriented feedback and often invite them for future high-profile projects. This professionalism turns testing into a gateway for deeper industry involvement.
Real-World Examples of Successful Pattern Testing
Hypothetical yet realistic examples illustrate the tangible impact of thorough testing on pattern success and business outcomes. Consider “Luna’s Lace Shawl,” a complex triangular shawl designed by an independent artist targeting intermediate crocheters. During the testing phase, an intermediate tester discovered that Row 42’s stitch count was off by two stitches due to a miscount in the repeat sequence—a subtle error easily missed during self-editing. The designer revised the pattern before release, preventing widespread frustration. Post-launch, the shawl became a bestseller with customers specifically praising its “flawless instructions” in reviews, directly attributable to rigorous testing. In another case, a beginner tester working on a simple beanie pattern flagged that the term “magic ring” wasn’t explained, and no video link was provided. The designer added a concise definition and a QR code linking to a tutorial, making the pattern accessible to absolute novices. This small change expanded the pattern’s market significantly, with sales increasing by 30% among beginner crafters. For a business perspective, a crochet company launching a line of amigurumi animals used a diverse testing group including a tester with arthritis. This tester suggested ergonomic hook recommendations and noted that tight stuffing instructions caused hand strain. The company incorporated these insights into pattern notes, enhancing inclusivity and receiving commendation from adaptive crafting communities. A more detailed example involves a garment designer testing a fitted sweater pattern across six sizes. Initial tests revealed inconsistent ease across bust measurements due to unaccounted-for grading calculations. By having testers of various sizes create samples and provide precise measurements post-blocking, the designer adjusted the grading formulas. The revised pattern fit true to size for 95% of users, resulting in minimal customer service inquiries and numerous five-star reviews highlighting “perfect fit.” These examples underscore how testing transforms good patterns into exceptional, market-ready products by incorporating real-user perspectives that designers alone cannot replicate.
Customization and Adaptation Ideas for Testers
Pattern testing shouldn’t be rigid; skilled testers often adapt patterns thoughtfully to assess versatility and uncover hidden potential. For instance, testing a scarf pattern with different yarn weights—such as substituting worsted weight for DK—can reveal how the design scales, providing valuable substitution notes for the final pattern. Similarly, altering hook sizes intentionally within a reasonable range helps determine the acceptable gauge spectrum; a pattern that works with both 4.0mm and 4.5mm hooks offers greater user flexibility. Testers might also experiment with color changes in multi-hued designs to evaluate how striping instructions hold up under different dye-lot scenarios or personal preferences. Another productive adaptation is modifying sizing for garments—e.g., adding two inches to a sweater body length—to test the pattern’s mathematical flexibility and identify where adjustments require recalculating shaping sequences. These customizations, when meticulously documented with clear labels distinguishing them from the original instructions, offer designers insights into how their patterns might be used creatively by end customers. However, testers must communicate adaptations upfront to avoid confusing feedback; a note like “Tested with cotton yarn instead of acrylic; drape differed but stitch count remained accurate” provides context. Designers particularly value testers who push boundaries thoughtfully, as it highlights potential for pattern variations or expansion packs—such as a tester adapting a bag pattern to include a detachable strap inspiring a “premium edition” release. For community-focused designers, adaptation testing also reveals opportunities for inclusive sizing or adaptive features. The key is balancing fidelity to the original design with exploratory adjustments that generate actionable data without compromising the core testing objective. When executed well, strategic customization during testing sparks innovation beyond the original design scope, enriching the entire pattern ecosystem.
Best Practices for Pattern Testing and Maintenance
To sustain high-quality testing over time and across multiple projects, adopt best practices that ensure consistency, reliability, and mutual respect between designers and testers. First, establish a standardized testing protocol for all patterns, including mandatory swatching with photo documentation, structured feedback forms with consistent rating scales, and clear photo requirements at designated milestones. This uniformity makes it easier to compare results across multiple tests and identify recurring issue types. Second, maintain a centralized database of past tests—using spreadsheets or dedicated software—to track common error categories (e.g., stitch count mismatches in lace repeats), yarn behaviors, and tester specialties. This historical data helps designers anticipate issues in future designs and match testers to patterns more effectively. Third, prioritize transparent communication: set expectations upfront regarding deadlines, feedback depth, compensation (if any), and revision processes. Testers should feel comfortable asking clarification questions without fear of judgment, fostering an open environment where uncertainty is addressed early rather than leading to errors. Additionally, after a pattern is published, monitor customer feedback and Ravelry project pages for any overlooked issues; this post-launch vigilance allows for timely pattern updates that maintain brand credibility. For long-term maintenance, designers should periodically review and update older patterns based on new testing insights or evolving industry standards—such as refreshing outdated abbreviations or adding metric measurements. Finally, recognize and appreciate testers meaningfully: through public credits, early access to new designs, small gifts like yarn samples, or featuring their finished objects on social media. A respected, valued testing community becomes a designer’s greatest asset for continuous improvement, driving quality upward across the entire portfolio. These practices transform testing from a transactional task into a cornerstone of sustainable creative business.
Monetization Opportunities Through Pattern Testing
While pattern testing itself is often a volunteer activity or compensated modestly with the pattern itself, it opens legitimate doors to monetization within the handmade ecosystem when approached ethically. For dedicated testers, consistent high-quality feedback can lead to paid testing opportunities with established designers or yarn companies seeking reliable validation for premium patterns. Some testers build reputations that allow them to transition into pattern tech editing—a natural progression that commands higher fees for technical accuracy checks without physical making. For designers, well-tested patterns command higher prices and sell more units due to enhanced trust; customers willingly pay $8–$12 for a “tester-approved” garment pattern versus $5 for an untested one. Limited edition or “tester-exclusive” patterns can be sold to the testing group first at a discount, creating buzz and rewarding participants while generating early revenue. Additionally, the rich data gathered during testing—such as popular yarn choices, common substitution requests, or skill level pain points—can inform product development for related revenue streams like curated yarn kits, video workshops explaining tricky techniques, or printed pattern booklets. Businesses might also create membership models where subscribers pay a monthly fee for access to pre-release patterns for testing, blending community engagement with predictable income. Importantly, monetization must never compromise testing integrity; testers should remain objective and disclose any conflicts of interest. When approached as an educational extension of craft passion rather than a primary income source, pattern testing becomes a cornerstone of a sustainable handmade business model. It benefits all parties: designers gain quality assurance, testers develop expertise and connections, and customers receive superior products—ultimately strengthening the entire ecosystem through shared commitment to excellence.
Frequently Asked Questions About Testing Crochet Patterns
How do I become a crochet pattern tester?
Becoming a crochet pattern tester typically starts by engaging authentically with designers whose work you admire. Follow them on Instagram, Pinterest, or Ravelry; comment thoughtfully on their posts; and join their email lists to stay informed about testing calls. Many designers announce opportunities publicly in social media stories or newsletters, seeking volunteers with specific skill levels or yarn preferences. To increase your chances, build a portfolio of well-photographed finished objects (FOs) shared on platforms like Instagram or Ravelry, demonstrating your skill, attention to detail, and ability to follow patterns accurately. When applying, be transparent about your experience level, available time, and yarn stash—designers appreciate honesty over exaggeration. Some use Google Forms for applications to match testers to patterns efficiently. Remember that testing is often unpaid or compensated with the pattern itself, so approach it as a learning opportunity and a way to contribute to craft community growth. Reliability is key: meeting deadlines and providing thorough feedback leads to repeat invitations. Over time, consistent quality transforms you from an occasional volunteer into a trusted tester within designers’ inner circles.
What should I look for when testing a crochet pattern?
When testing, focus systematically on accuracy, clarity, and usability across all pattern elements. Verify stitch counts meticulously at the end of each row or round, especially in repetitive sections where errors compound. Check that all abbreviations are defined in a glossary and used consistently throughout. Assess whether instructions are logically ordered—e.g., are special stitches explained before their first use? Note any ambiguous phrasing like “continue until piece measures X inches” without specifying where to measure. Evaluate yarn requirements by weighing your yarn before and after; significant deviations from stated yardage indicate miscalculations. For garments, confirm measurements against the schematic after blocking, checking ease and fit. Document points where you felt confused, had to pause to decipher instructions, or made errors requiring frogging. Also assess formatting: are charts aligned with text? Are photos helpful or distracting? Your goal is to simulate a typical customer’s experience, catching issues that would cause frustration or project abandonment. Specificity is crucial—instead of “hard to follow,” note “Row 34’s decrease sequence lacked stitch count verification, causing misalignment.”
How long does pattern testing usually take?
Duration varies significantly based on pattern complexity, tester availability, and designer deadlines. Simple accessories like coasters or dishcloths might take 2–5 hours total, including swatching and feedback. Intermediate projects like beanies or small bags typically require 8–15 hours spread over 1–2 weeks. Complex garments or lace shawls can demand 20–40+ hours over 3–4 weeks, accounting for swatching, execution, blocking, and detailed feedback. Designers usually set deadlines ranging from 10 days to one month, allowing time for potential revisions. Before committing, honestly assess your schedule—consider work, family obligations, and other crafting projects. It’s better to decline an opportunity than to rush testing and provide subpar feedback. Effective testers block out dedicated crafting time in their calendars and communicate proactively if delays arise. Remember that quality matters more than speed; a thorough two-week test delivers more value than a rushed three-day one. Designers appreciate testers who manage time responsibly and deliver comprehensive feedback by the agreed date.
Can I test patterns if I’m a beginner?
Absolutely—beginners are essential testers for patterns targeting novice crafters, as your fresh perspective highlights areas where instructions may assume prior knowledge that experienced crafters overlook. Start by seeking patterns explicitly labeled “beginner-friendly,” “easy,” or “first project.” Be transparent about your skill level when applying; designers often welcome beginners for appropriate patterns. Focus your feedback on foundational elements: Are basic stitches like single crochet explained clearly? Is terminology defined? Are photos helpful for visual learners? Does the pattern build confidence or cause frustration? Many designers value beginner input precisely because it reveals gaps in scaffolding that experts no longer notice. For example, a beginner tester might flag that a pattern says “join with a slip stitch” without explaining how to do so, prompting the designer to add a simple illustration. Approach testing as a learning opportunity—each pattern you test accelerates your skill development through guided practice. As you gain experience, you can gradually test more complex designs. The crochet community thrives on inclusivity, and beginner testers play a vital role in making patterns accessible to all skill levels.
What is the difference between a tester and a tech editor?
A pattern tester physically crochets the design following the instructions, providing feedback on usability, clarity, and accuracy from a maker’s perspective. They catch practical issues like confusing phrasing, stitch count errors during execution, or yarn estimation problems. A tech editor, however, performs a detailed technical review without necessarily making the item; they check mathematical accuracy (stitch counts, row repeats), consistency in terminology, formatting adherence to style guides, and structural integrity on paper. Testers answer “Can a crafter successfully make this?” while tech editors answer “Is this pattern mathematically and technically sound?” Both roles are complementary and often used together for high-stakes patterns—testers find execution flaws, tech editors catch calculation errors. Some professionals offer both services, but the skill sets differ: testing requires strong hands-on crafting ability and empathy for user experience, while tech editing demands analytical precision, attention to detail, and knowledge of industry standards. Designers may use tech editors early in development and testers later for real-world validation. Understanding this distinction helps crafters choose which path aligns with their strengths.
How do designers select testers for their patterns?
Designers curate testers based on strategic alignment with the pattern’s target audience and project needs. For a baby blanket pattern, they might seek parents or crafters who prefer soft, machine-washable yarns. Selection criteria typically include: skill level matching the pattern’s difficulty, geographic location (to account for yarn availability and measurement systems), past testing reliability (if applicable), diversity of perspective (e.g., left-handed crafters, adaptive needs), and aesthetic alignment with the designer’s style. Many designers use application forms with questions about experience, yarn preferences, and availability to gather this data efficiently. Some maintain a private, vetted testing group of trusted individuals for frequent collaborations, while others open calls to the public to reach broader demographics and avoid echo chambers. The goal is assembling a team that mirrors the intended customer base, ensuring the pattern resonates with its market upon release. Building a reputation for thorough, timely, and constructive feedback significantly increases your likelihood of selection for future tests. Designers value testers who communicate professionally, meet deadlines, and provide specific, actionable insights—qualities that transform one-time volunteers into long-term collaborators.
Conclusion
Testing crochet patterns is far more than a quality checkpoint; it is a collaborative art that bridges design intent with user experience, strengthening the entire handmade ecosystem. Throughout this guide, we’ve explored how meticulous testing enhances pattern accuracy, fosters community trust, and supports sustainable business growth in the crafting industry. By adopting structured methodologies, leveraging diverse tester insights, and avoiding common pitfalls, designers can elevate their work from functional to exceptional. For testers, the process offers a rewarding avenue to deepen skills, contribute meaningfully to craft evolution, and connect with like-minded creators. As the crochet industry continues to expand globally, the importance of rigorous pattern testing will only increase, serving as a hallmark of professionalism and care that distinguishes respected brands. We encourage both designers and crafters to embrace testing not as a chore but as an integral, joyful part of the creative journey—one that ultimately enriches every stitch and strengthens the fabric of our global crafting community. Whether you’re drafting your first pattern or refining your hundredth, remember that each test is an opportunity to learn, improve, and contribute to a culture of excellence. Start small, apply these principles consistently, and witness how this practice transforms your approach to design, making, and community engagement for years to come.

Anne Williams is a passionate crochet artist who finds purpose and expression through yarn and handmade creations. Driven by creativity and a love for the art of crochet, she transforms ideas into unique pieces, blending patience, care, and authenticity. Always eager to explore new techniques and inspire others, Anne believes crochet is a way to slow down, tell stories, and create beauty with meaning.